
As I have decided to make claw-like appliances for my Fujin character, I will need to research how to create hand appliances.
Moulding
Panjak Guru How to Make a Cast of your Hand (2013) [online] Available from:https://www.youtube.com/watch?v=EaQRKLNcDxo [Accessed: April 5th 2015]
 Screen Shot 2015-04-07 at 18.10.46.png |  Screen Shot 2015-04-07 at 18.10.51.png |
|---|---|
 Screen Shot 2015-04-07 at 18.13.07.png |  Screen Shot 2015-04-07 at 18.13.44.png |
 Screen Shot 2015-04-07 at 18.14.59.png |  Screen Shot 2015-04-07 at 18.16.02.png |
The moulding process for this seems very straight forward; put the hand in mixed alginate, wait a couple of fminutes for this to set and then pull the hand out. Then fill the negative mould with plaster.
- Make sure to mould the arm in a tub of alginate
- Cover the arm in vaseline or nivea first
After extensive internet research, I can't find any information on how to mould a sculpt on a positive hand cast.
After talking to someone who has made hand appliances previously, I now know that I can make a resin positive of the hand by pouring resin straight into the alginate mould (after rinsing it with acetone). She then made a 2-part injectable fibreglass mould.
I found this other video which was making a 2 part silicone mould of a sulpted hand. I was thinking it might be an alternative method for me. If I moulded my sculpt in the same way, with mould making silicone, de-moulded it and cleaned off any clay, then taped the mould together with the resin hand inside and made the incision at the top then I think that would work.
I would have to discuss the best method with a tech-dem or maybe try both if I have time.
 Screen Shot 2015-04-08 at 10.59.21.png |  Screen Shot 2015-04-08 at 10.59.25.png |
|---|---|
 Screen Shot 2015-04-08 at 10.59.37.png |  Screen Shot 2015-04-08 at 11.00.04.png |
 Screen Shot 2015-04-08 at 11.01.02.png |  Screen Shot 2015-04-08 at 11.01.44.png |
 Screen Shot 2015-04-08 at 11.02.46.png |  Screen Shot 2015-04-08 at 11.03.25.png |
 Screen Shot 2015-04-08 at 11.04.19.png |  Screen Shot 2015-04-08 at 11.04.39.png |
 Screen Shot 2015-04-08 at 11.04.46.png |  Screen Shot 2015-04-08 at 11.04.59.png |
 Screen Shot 2015-04-08 at 11.05.16.png |  Screen Shot 2015-04-08 at 11.06.08.png |
 Screen Shot 2015-04-08 at 11.06.40.png |  Screen Shot 2015-04-08 at 11.06.44.png |
 Screen Shot 2015-04-08 at 11.07.00.png |
Jonathen Neill EASY! TWO PIECE MOLD - Silicone & Resin casting
(2012) [online] Available from:https://www.youtube.com/watch?v=ToIw2bTfoq8[Accessed: April 5th 2015]
Nails
- File the nail into a more pointed shape
- File accross the surface of the nail to roughen it up so that the clay will stick to it better
- Use fimo air drying clay/paper clay.
- Mould the shape you want and press it into the nail, manipulating it into the correct shape
- Wait for it to dry for a few minutes, then use a spooly brush to scrape across it and add some texture
- Then stick it to a pentil with blue-tack so that its a lot easier to paint
- Paint front and back
- Then file the surface slightly to roughen them more and mattify them slightly
KlairedelysArt (2013) DIY: Claw Nails [online] Available from: https://www.youtube.com/watch?v=L_S7vQegzwU&spfreload=10 [Accessed: April 12th 2015]
I think adding some kind of glue before applying the clay would help with adhesion. Other than that I think this is the perfect way to create claw-like nails for the Fujin. I think long filed nails will look to feminine and feeble, I want the nails to look like rough, hard claws.
This might be effect enough for the hands. I will consider the logistics of hand prosthetics and then decide.
 Screen Shot 2015-04-11 at 21.37.11.png |  Screen Shot 2015-04-11 at 21.37.17.png |  Screen Shot 2015-04-11 at 21.39.03.png |
|---|---|---|
 Screen Shot 2015-04-11 at 21.39.33.png |  Screen Shot 2015-04-11 at 21.39.41.png |  Screen Shot 2015-04-11 at 21.40.18.png |
 Screen Shot 2015-04-11 at 21.40.38.png |  Screen Shot 2015-04-11 at 21.41.25.png |  Screen Shot 2015-04-11 at 21.42.08.png |
 Screen Shot 2015-04-11 at 21.42.22.png |  Screen Shot 2015-04-11 at 21.42.36.png |  Screen Shot 2015-04-11 at 21.42.45.png |
Teeth
I really don't know if i'll have time or if I can find a safe a reliable method, but I would really like to create teeth for my Fujin character if possible. Having seen a talk at the prosthetics event that advised that it shouldn't be done unless you're a trained professional, I am a little scared to try it. However, I also want to put myself and learn new techniques.
Debrecini T. (2012) Special makeup effects for stage and screen : making and applying prosthetics London: Focal Press
 Screen Shot 2015-04-12 at 10.41.50.png |  Screen Shot 2015-04-12 at 10.42.13.png |  Screen Shot 2015-04-12 at 10.42.18.png |
|---|---|---|
 Screen Shot 2015-04-12 at 10.42.26.png |  Screen Shot 2015-04-12 at 10.42.31.png |  Screen Shot 2015-04-12 at 10.42.37.png |
 Screen Shot 2015-04-12 at 10.42.41.png |  Screen Shot 2015-04-12 at 10.42.50.png |  Screen Shot 2015-04-12 at 10.42.53.png |
 Screen Shot 2015-04-12 at 10.43.02.png |  Screen Shot 2015-04-12 at 10.43.09.png |  Screen Shot 2015-04-12 at 10.43.16.png |
Tokyo SFX Makeup Workshop A Complete Guide to Special Effects Makeup (2012) London: Titan Books


Tokyo SFX Makeup Workshop A Complete Guide to Special Effects Makeup (2012) London: Titan Books

Tokyo SFX Makeup Workshop A Complete Guide to Special Effects Makeup (2012) London: Titan Books


 image17.jpeg |  image18.jpeg |
|---|---|
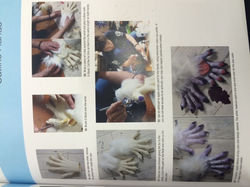 image19.jpeg |
 image2.jpeg |  image3.jpeg |
|---|---|
 image4.jpeg |  image5.jpeg |
 image6.jpeg |  image7.jpeg |
 image8.jpeg |
M Spatola The Monstrous Makeup Manual Book Number 2 (2010) London: uknown
 image15.jpeg |  image16.jpeg |
|---|---|
 image17.jpeg |  image18.jpeg |
 image19.jpeg |
M Spatola The Monstrous Makeup Manual Book Number 1 (2010) London: uknown
 image1.jpeg |  image2.jpeg |  image3.jpeg |
|---|---|---|
 image4.jpeg |  image5.jpeg |  image6.jpeg |
 image7.jpeg |  image8.jpeg |  image9.jpeg |
 image10.jpeg |  image11.jpeg |  image12.jpeg |
M Spatola The Monstrous Makeup Manual Book Number 2 (2010) London: uknown
 image14.jpeg |  image15.jpeg |
|---|---|
 image16.jpeg |  image17.jpeg |
Debrecini, T. Special Makeup Effects for Stage and Screen (2008) Amsterdam: Focal Press


Simblet, S. (2001) Anatomy for the Artist. London: Dorling Kindersley Publishers


Metallic silver nails for Gary Oldman's character in Red Riding Hood (2011). Meant to look like metal talons.
Makeup Artist Magazine. Red Riding Hood. Issue 56 (2011)


This DVD helped give me a more extensive idea of how I could potentially create hand/finger appliances. I like the method of sculpting and moulding the hand piece, but i'm not sure if I need to make my appliance that large. Also the moulding of the finger extensions was really interesting, but as I want my pieces to make the hands look muscular and bulky, I don't want to extend the finger at all. I also want the piece to come onto the hand a little, which this method doesn't allow for.
I think after researching and reviewing all my options, I shall sculpt hand appliances onto my model's hand casts, float them off and create them as flatpieces. This will enable me to create slightly bulky looking hands and add some texture as well.
HAND PIECES
Notes:
- make grounding from epoxycal
- it will be a squish mould
- all the grounding is the run off
- kyolan Crystal clear acrylic; provides a permanent protective gloss coating that is moisture resistant and smudge proof. Apply to all the clay but don't get it on the cutting edge around the sculpt (apply a clay worm to cover this)
- apply Vaseline to the stone cutting edge area and contact points
- mould piece with epoxycal, it's cheap in comparison to other materials.
- paint one layer and then wait for it to be tacky but firm
- then do thick layer of ultracal with burlap (4-6 layers of burlap)
- I assume that making these stone arm positives is a similar process to the fingers:
1. Cast the top half of the arm


 image13.jpeg |  image14.jpeg |
|---|---|
 image15.jpeg |
Stan Winston Studios. Character Makeup: Sculpture Breakdown and Mould-Making Part 2 (2011) [DVD] USA
2. Fill with plaster
3. Sculpt the shape and points into the plaster
4. Mould that in silicone
5. Pour in resin/ultracal....
FINGER EXTENSIONS
Notes:
- octagon or hexagons base, makes for the best kind of contact
- cut a notch key in the base as well and then it can only fit one way
- acetone is the best way to clean up a cutting edge
- glue pieces to a board with a little superglue
- make the grounding by laying 3 lines of clay from the bottom of the sculpt to the bottom of the hexagons base (which means when the silicone mould is filled, that the excess has a place to go) and have a sharp edge quite close to the bottom of the fingers cutting edge
- hot glue base of cup around finger to he board
- long pour to minimise the amount of air bubbles
- then de-mould the finger cups, break them off the board
- remove the silicone by cutting it up the underside of the fingers
- the triangle key was put at the backside of the finger, so the underside is the opposite
- can pull the whole sculpt out in one piece
- put silicone mould back in the cup which means there will be almost no seam
- can then fill mould with flexacryl and put in finger positive
- I think I would start this method by individually casting my models fingers in small cups of alginate. I would then sculpt clay around the top of the alginate to make the hexagonal base and then pour in either resin or expanding foam. I could then sculpt and mould the pieces
- after talking to my tutor I was told that the following is the correct method
1. Mould the fingers in alginate
2. Attach them to a surface and sculpt the hexagonal base on clay
3. The mould this in silicone
4, Pour in resin to get finger positives
 image1.jpeg |  image2.jpeg |
|---|---|
 image3.jpeg |  image4.jpeg |
 image5.jpeg |  image6.jpeg |
 image7.jpeg |  image8.jpeg |
 image9.jpeg |  image10.jpeg |
 image11.jpeg |  image12.jpeg |
This book had a tutorial for creating elaborate nails with 3D patterns.
They recommended using epoxy putty to create the designs and glue them on with instant adhesive.
I now know that I can paint my nails with acrylic paint, but as I don't want it to flake off at all, I may seal it with clear nail polish - probably matte rather than shiny.
Example of nails used for film purposes. Information was not given as to how they were made, just that they were meant to look like metal talons.
This prosthetic troll hand was made for Harry Potter and the Philosepher's Stone, while the rest of the troll was made with CGI.
The hand is quite long and wrinkled, quite a different structure to a human hand.
I was hoping to find an example of a big, muscular hand to inspire my design, but this is not the effect I want to create. I think I will base my hand pieces loosely off the Hulk, as it doesn't require much detail or need to look humanistically real, as it's meant to look like a statue.
Should I want to make the hands look bigger from a muscular perspective, this book gives a diagram showing exactly which areas on the digits and hand I would need to enlarge, However, as my character is a deity, I may steer clear of this to avoid him looking anymore human than he already will.
I have now learned from tutors that any kind of teeth appliances are not to be used. Atleast I know possibilities for future reference.
As I want him to look statue-like all over, I don't know if theres any kind of technique I could use to make his teeth look different, as I don' really want them to look like normal human teeth.
McCabe B. 2011 Harry Potter; From Page to Screen. London
The Tokyo SFX Workshop had a slightly different technique to making finger extensions than the Stan Winston DVD (below).
Firstly, I dont see how their hand moulding process makes any sense, as the plaster didnt cover all the way round the fingers, and so if you poured plaster into their alginate cast, it would just pour out.....
The book was also extremely unhelpful with regards to how to mould these pieces. It explains that you build a WED clay wall, and that the mould is made of plaster and to vaseline the first side of the plaster. What it doesn't show you is the wall built out of clay, the first half of the mould, how to make some kind of conatiner so the plaster wouldn't flow everywhere. I think to do this method you'd need to do further research just to understand it.
They also demonstrated another technique which showed how to make hands out of gloves, G-bond, cotton and latex. I think this method would be fine for costume or theatre purposes, but is definately too cartoon looking for film standard.
Eyes
Although I only thought briefly about making eyes for my character, I found this technique really interesting as an alternative to creative vac-formed eyes.
The obvious drawback is that it doesn't allow the performer any vision, but I think they look far more realistic than most of the vac-form eyes, i've seen.
I think the main part of this technique that makes it so successful is actually the way they paint the eye to make it so realistic, which I imagine could also be
applied to vac-form eyes.


Tokyo SFX Makeup Workshop A Complete Guide to Special Effects Makeup (2012) London: Titan Books
Although I tried to research it, I couldn't find how to make glove like hand appliances, but through my research, I think I now understand how they would be made.
I think it would involve following the same method as for these finger appliances but taken all the way up to the point on the arm that you wanted the appliance. So you sculpt the piece completely over the core of the arm and hand and then make the grounding just like in this picture, but halfway up the arm (wherever the sculpt finishes). You'd then build a WED clay wall between the fingers and fibreglass the first half of the mould. Then remove the clay and fibreglss the second half. You'd then have a mould. I think the best method would be to make the piece out of foam latex.

Makeup Artist Magazine. uknown Issue 57. 2006.
© 2023 by Tennis Lessons with Karen. Proudly created with Wix.com