
Claire Golby
Level 5
Dramatic Contexts


The Nose
The Devil's Double. (2011) [online image] Available from:http://cache.reelz.com/assets/content/repFrame/56458/DevilsDoublePremiere.jpg [Accessed: 12th November 2014]
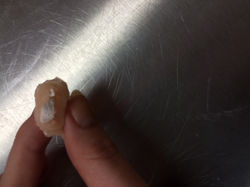
I'll be doing a closed mould to create a prosthetic nose. As Alex has a very straight nose, i'll need to sculpt the bump on the bridge of the nose. I want to experiment with materials for it, as I don't think the edges of gelatin prosthetics blend thinly enough to look seamless. I will try it with silicone, using a slightly harder mix than the first lot of flatpieces i made. If that doesn't work I might try bondo, but I think making this work with silicone is important. I will colour the silicone slightly, but I don't want it to look too pigmented or too dark, as my portrait is so pale.
A really subtle example of the use of a nose prosthetic is in the film "The Devil's Double" where Dominic Cooper plays a man and his body double. The nose and teeth prosthetics add subtle definition between the two. You can see the curvature on the bridge of the nose on the left, compared to the straight bridge on the right.
Philip IV Spain. (1869) [online image] Available from:http://madmonarchist.blogspot.co.uk/2010/06/monarch-profile-king-philip-iv-of-spain.html [Accessed: 12th November 2014]


Sculpting
I sculpted my nose similarly to how I sculpted my gelatin one, as, after applying it to my model, I feel I'd achieved an accurate shape. I raised the bump on the bridge and because of the stance of the sitter in the portrait; I sculpted so that it works from that angle. This is why it isn't symmetrical and the bump leans more to the right. I also didn't add any texture to the sculpt, and kept it smooth as you can't see any texture in the portrait. When sculpting the grounding I initially started with the clay way too thick. After talking to my tutor, I was advised to take the
thickness down a lot, as having it too thick could ruin the plaster mould. I also checked with my tutor after having done that, and he pointed out that my two touch down points around the nostrils could inhibit the mould, forcing it to lock, which was something I hadn't considered and will definately remember for future reference. So after building these areas up with clay I covered all the plaster with a layer of vaseline for moulding.
Moulding
Because of some of the indents on the facecast where i'd built it up with plaster, I was initially quite worried the mould would lock. I filled in some of the larger holes with clay and put on a lot of vaseline and thankfully the mould came out really well and with very little difficulty. I didn't plaster the mould as neatly as id've liked, but I think i managed to get it flat enough on the top so that it will lie relatively flat on hard surfaces for filling it. I found doing the proplastic plus suspension layers quite annoying because the fluid all ran to the lowest point of the mould, so I tried to tilt the mould and run the liquid all the way round to prevent a build up of it all at one point.
Running it in Silicone
 After pulling moulds apart |  Trying to remove the piece |
|---|---|
 Piece falling apart |  Half the nose |
 Silicone pulled out plaster |
 The moulds after being taken apart |  Starting to remove the piece |
|---|---|
 Its working better than the first |  Ripping slightly, but nose may be ok |
 Damaged but salvageable |
Attempt 1
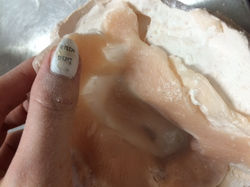
For my first attempt, I basically followed exactly the same protocal I did for running silicone in a flat piece silicone mould; I did a layer of vaseline (on the mould and face), 4 layers of proplastic plus, poured in the silicon (100% deadened), put the mould and face cast together, waited for the silicone to set, removed the mould and face cast and did 4 more layers of proplastic plus. The piece didn't come out at all, I had to rip and peel it out and clean out the rest with lighter fluid. The only reason I can think of for it not working, it that I used vaseline. My tutor suggested using mould release instead, which I will try for my next attempt.
Attempt 2
My second attempy went slightly better than my first. As I didn't know how to use the mould release, I assume it worked like Vaseline but was wax-based, so I applied a layer to my mould and then repeated the same process as last time. I then found out that you are meant to apply a layer, dry it under a hood drier for 10 minutes, buff it and repeat this process 3 times. I was able to do this for this face cast, but i'd already poured the silicone into my mould. For some reason my mould and face cast were really difficult to pull apart, so I had to ask someone from the mould room to chisel it apart for me, which worked fine.
The piece definately came out better, but ripped similarly to last time. I think for my third attempt if I apply the mould release correctly, the piece will come out well. I will use this piece for my formative, as I will still be able to see how it applies to my model, even though it is slightly damaged.
Attempt 3
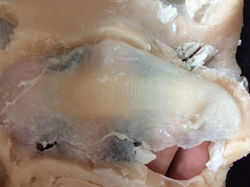
On my third attempt, I used the mould release correctly and did 4 layers on both the mould and lifecast just to be on the safe side. I did about 5 layers of the proplastic suspension layer and mixed the silicone with 100% deadener and this is the best it's come out so far. Compared to both my other attempts there were very few tears the cap plastic seemed to encapsulate the silicone a lot better, as the grounding came out neater than it ever has. I trimmed the nose from within the grounding because I find it a distraction when trying to apply it. This is the piece I will use for my summative assesment.
 IMG_2378.JPG |  IMG_2379.JPG |
|---|---|
 IMG_2382.JPG |  IMG_2386.JPG |
I found a really helpful in-depth article in makeup artist magazine about specific materials to use when making a silicone piece. It happens to feature a closed mould nose piece which is very relevant for me. Some of the materials I haven't used or heard of, but I think it will be helpful to take note of themfor future reference.


Singer, M. (2011) A Need-to-Know Silicone Technique. Makeup Artist Magazine. No. 88. January. page 78 and 79.
Things I took away from this article:
- Plaster is not a recommmended material to use to make this kind of mould
- Sulfur-based clays can inhibit the curing of silicone
- 'Bleeders' should be drilled in to the deepest points of the posterior side of the mould to prevent air bubbles. I presume this is why plaster is not used, as it would crack.
- Liquid dish soap can be used to clean the moulds
- One spray coat of Epoxy Parfilm can be used as a release agent
- Baldiez can be used as the encapsulating layer in a ration of one part Baldiez to 4 prts acetone. Baldiez is blended with acetone.
- A 'binder' can be used to adhere the encapsulating layers to the silicone. Telesis 5 medical adhesive can be used to adhere the baldiez to the silicone. Use its own thinner to thin it down, or Ensolve.
- To get rid of silicone bubbles, place the silicone mix in an evacuator for 2 minutes
- A brush can be used to make sure the silicone fills all the edges of the mould.