Stage 3 Horns
These horns give me the opportunity to experiment with new materials. Like the stag 2 horns, they will be seperate prosthetics, but the skin area and the horn area will also be made seperately. As these horns are bigger, they need to be rigid but light, so that in acting context they wouldn't wobble, and they could be worn for long periods of time.
These slides show the practical up until the method of moulding the silicone, which is where my experimentation with different methods is illustrated.
 image2.jpegI took inspiration for the sculpt of these horns from small deer, the kudu antelope (from my research) and also Maleficent. |  image3.jpegI wanted the horns to look slightly rough and worn, so I lightly drew lines across them with a sculpting tool and then went in with a rough burgh and lighter fluid so they wouldn't be too smooth. |  image4.jpegI kept checking the horns from different angles to ensure they were symmetrical heights, widths and lengths. |
|---|---|---|
 image5.jpeg1st layer of silicone with cabosil. |  image6.jpegTrimming the outer edge of the silicon away after a 2nd layer. |
 image7.jpegBuilding up a wall of WED clay for the 2-part fibreglass mould. I applied a coat of blue PVA onto the WED clay as the water from the clay would inhibit the fibreglass working properly. |  IMG_3868.JPGFirst side is fibreglassed. I didn't need to do a gel coat with this method, as small details didn't need to be picked up, its more about having a stable outer-wall to stop the silicone distorting when the rigid foam is poured in. |  IMG_3869.JPGI used 3 layers of carnuba wax (dried and buffed) and a layer of epoxy parfilm to stop the next wall of fibreglass from sticking to this one. |
|---|---|---|
 image3.jpegFigbreglassing the other side of the silicone mould. |  image5.jpegI then drilled 5 holes around the edge of the mould so it could be bolted shut. |  image6.jpeg |
 image7.jpegThe silicone mould pulled right off the clay without leaving any residue in the mould. |  image5.jpegThen it came to filling the silicone moulds. The first step is to do a thin slosh layer of fast cast to create the outer layer. This can be coloured with resin colours or acrylic paints but not greasepaints. |  image13.jpegI then mixed and poured the expanding foam. I actually forgot to put the silicone mould into the fibreglass mould for this process, which I thought would completely distort the horn, as the expanding foam would push and distort he silicone mould, but it actually came out fine. |
 image14.jpeg |  image21.jpegI decided to run this horn again following the correct method, and this time bolted the fibreglass mould around the silicone before pouring anything. |  image3.jpeg |
 image4.jpeg |  image11.jpegI think the colour didn't mix fully, or I didn't use quite enough because the final pigmentation is off. |  image12.jpegThe piece came out fine, although the very tip of the horn was still slightly flexible. I think this may be because I didn't pour out enough of the fast cast before pouring in the expanding foam and so the fast cast wasn't totally dry when I took it out. |
The Fibreglassing Method
These slides illustrate the method and results I had from moulding the silicone with fibreglass, creating a 2-part mould around the silicone to help it retain its shape for when the expanding foam is poured in.


The Base for the Horns
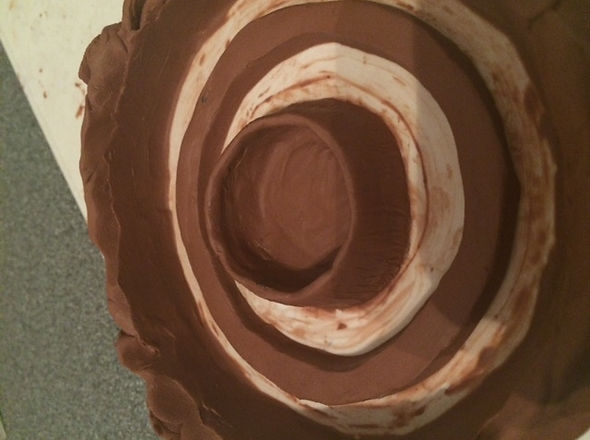
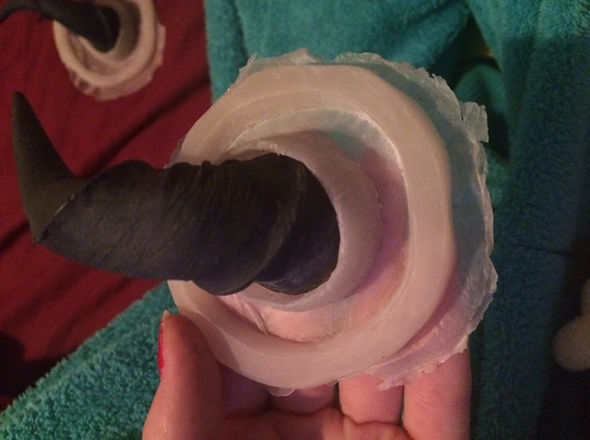
As I have created the horns as seperate, individual pieces, I then had to create an appliance for them to be attatched to when they were applied to someone. I sculpted these as flatpieces, using the base of the horns as a measurement to ensure that they'd fit. I sculpted in a few horizontal, textural lines to make the surrounding skin slightly more cohesive with the knarled look of the horns. I moulded these in silicone and will run them in silicone.


- I ran the pieces in silicone with 50% deadener, (after applying 4 layers of ecapsulator) as i wanted them to be able to hold the horns well without being too floppy.
- The pieces came out of the moulds very easily, although the encapsulator wasn't sticking very well to the bottom of the piece. It will work fine, it was just when I was pulling it out of the mould that it was an apparant problem.
- As advised by my research, I painted them with skin illustrator, which I think created a realistic look. I wnated them to look slightly knarled, like the horns, like the surrounding skin was congrous with the horns. so I painted the indents in the pieces a darker skin shade with a hint of purple.
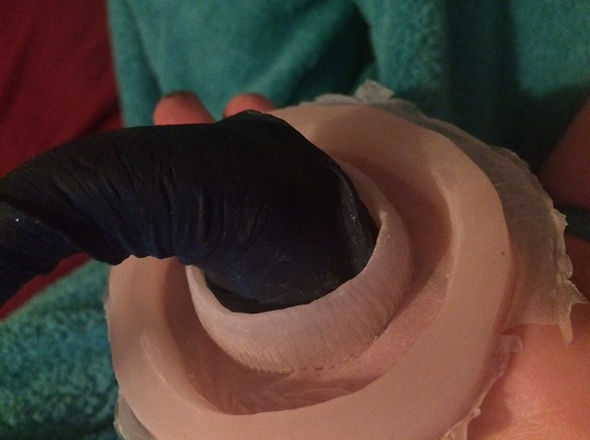
- Unfortunately, as you can see in the picture, the appliances are slightly loose fitting around the horns. I really thought I'd sculpted them to fit well, as I was worried this might happen. I think i'll be able to stick the sides onto the horns a little but it might cause the shpae of the silicone to look distorted.
Obviously for film context, this is unacceptable. I would re-sculpt, re-mould and re-run the pieces until they fit the horns perfectly. I don't have time to do that for these pieces for this project, but for industry and contextural purposes, thats what I would do.
I will still apply them and take a photo, as they will look ok, but as far as acting in them and moveability, the fit might prevent them from being as stable.
The Plastering Method
These slides illustrate the method and results I had from moulding the silicone with modrock, creating a 2-part mould around the silicone to help it retain its shape for when the expanding foam is poured in.
 image11.jpegLike the fibreglassing method, I plastered one half first, except I didn't need a clay wall as I just fashioned the clay to create a slight horizontal wall at the top. |  image12.jpegI baselined along the sides before plastering the other half so that the two halves wouldn't stick together. Unlike fibreglassing, this mould isn't drilled, but when it is used around the silicone, it is simply held together with something like cling film or elastic bands. |  IMG_3945.JPGThis is the mould in use. I made sure to use enough expanding foam, as if there is too little, then the fast cast forms the bottom of the horn and it just chips away. |
|---|---|---|
 image10.jpegI tried using a vibrosaw to cut off the excess foam, but it was really resilient. I then tried a hacksaw which took too long, and then I decided to try an industrial sanding machine which worked really quickly and gave a smooth finish. |  image11.jpegUnfortunately the end snapped off the horn from the plaster method, but for photo purposes, reattaching it with glue will be fine Again, if this was s film set, I would re-run it until it was perfect. |
© 2023 by Tennis Lessons with Karen. Proudly created with Wix.com