I recently found this article (again, from Neil Gorton's 911 facebook page) on gelatine prosthetics and it seems to a difinitive guide to moulding colouring a mixing your own gelatine:
https://www.facebook.com/notes/neill-gortons-make-up-fx-911/about-gelatin-prosthetics-information-recipes-and-instructions/391651644206807
ABOUT "GELATIN" Prosthetics- Information, Recipes and Instructions
By Naomi D Lynch on Saturday, 19 May 2012 at 03:37
What this document contains is not a simple recipe
![]() , it contains all of the best and most useful info I have collected, anywhere I could find it, on how to use Gelatin for appliances. Other people have also added details and corrections here and there.
, it contains all of the best and most useful info I have collected, anywhere I could find it, on how to use Gelatin for appliances. Other people have also added details and corrections here and there.
I confess to not having personally done gelatine appliances. I live in Western Australia and it gets HOT here in summer, hot enough to melt most of the stuff in your kit, let alone on an actor, onset. In high summer in some locations its hitting 95% humidity and 45C, (or even worse!! ) so the one time I intended to try it my samples liquefied in my kit! Never got around to trying it again but it would definitely not be in summer next time.
(Reading the below, that is not an uncommon problem. Matthew Mungle and Neill Gorton have both managed to successfully use it in hot places, but I do remember reading something Matthew said where he had changed his mind on the very long involved process he originally used for sealing the pieces and the skin before adhering, on account of it took so long to get the stuff OFF the actor at the end of the day....)
Have a quick flick through and then go back and read in detail.
First up is a bunch of questions and answers from THEEFFECTSLAB.COM FORUM
Then there is a report of a lecture Matthew Mungle gave on the subject,
Then a recipe
![]() and info from Lars Carlsson's very informative and helpful site,MAKEUP-FX.COM
and info from Lars Carlsson's very informative and helpful site,MAKEUP-FX.COM
Lastly some great historical info on the development and history of the technique, and the components used, and the reasons why, from Sapsema.Org.
So here goes, I hope it is useful:
THEEFFECTSLAB FORUM Q & A
TOPIC: Better gelatin appliances for heat
In Silicone vs. Foam vs. Gelatin for short film project post, Ralis brings up a good idea that we ought to spin off to a new topic of gelatin formulas that folks have had better heat stability with. In my experience its not the formula (figuring zinc oxide in the mix) its the sweat underneath combined with the heat of the skin. Started looking up past posts and didn't really find it in once place. Have had great experiences myself except for two times. Once on the Geraldo show a witness protection guest began to lose it when they brought out all the people sworn to kill him as the other guests. The other was a full face on a dwarf running around in the worst DC heat. Sent some stuff off to a Hollywood guy to experiment on Last Man Standing which was a God aweful hot location. Obviously they didn't last long on a sweater in a desert location.
So any formulas you trust? Application methods?
______________________________________________________
I watched Matthew Mungle do his demo/lecture at the first Make up artist convention.
He used a layer of pros aid followed by a layer of sealor, then another layer of pros aid and another layer of sealor.
This was the sweat barrier.
I use Michael Davy's Sweat stop on the skin.
Some times I powder the skin with zinc oxide.
I clean the appliance with 99% alcohol then put on the sweat barrier.
I found out about adding pros aid to the gelatin from someone who was experimenting with it on the east coast.
add 1 ounce of P.A. per 100 grams of glycerin after you cook it but before casting.
I have heard of molds being made from gelatin and elmers glue...So it would seem that you could add a plastic quality to the gelatin and increase its resistance to sweat.
I have mixed elmers glue and pros aid to make a custom flocking adhesive when I was doing large pieces.
I have had issues with pros aid re-hydrating from sweat under appliances including foam. I was seeing this milky substance dripping from under the appliance and realized it was re-hydrated pros aide-sweat.
If it has to stay on in sweaty conditions I use silicone adhesive, I prefer the Kryolan extra strength medical adhesive, they don't have a thinner so use the telesis thinner
On that gelatin lip, I cleaned the lip and appliance with alcohol. I made sure the lip stayed dry, powdered with zinc, applied a layer of glue and powdered again with zinc.
On the inside of the appliance I did the pros aide sealor thingy, then applied a layer of glue, powdered with zinc. I used glue to reactivate the layer on the lip and appliance and I layed it down.
That sucker was on there!
All the "layers" were very thin.
Back to the formula: It may be worth experimenting with P.A. and Elmers glue ratios in combination with the usual Glycerin/Sorbitol/Water/Gelatin/Zinc
a couple of notes:
I desolve the zinc oxide in alcohol before I add it to the gelatin
I like the look of flocking in the gelatin but the synthetic fiber
![]() would melt when I reheated the mix.
would melt when I reheated the mix.
Mike the Make Up Guy showed me his trick of making his own flocking from crepe wool and a beard trimmer, wool doesn't melt and you can customize the length of your flocking!
As far as heat resistant gelatin, I did a series of tests a couple of years ago using some of the various formulas and additive mentioned. I added Prosaide, vinyl medium, zinc oxide, and experimented with various proportions of basic ingredients.
I tested them with a warm water drip test by setting up a bucket in the hot sun and filling it with water letting it come up to a toasty 98 degrees F. The water was then dripped at a constant rate using IV tubing on the center of pucks of gelatin that I made by pouring the various mixtures into muffin cups to a depth of 1 inch. After 10 minutes I checked the depth of the hole created and the general consistency of the surface of the pucks. To make a long story short (I know, too late ) the only thing that substantially improved the gelatin's resistance to erosion by warm water was to increase the proportion of gelatin to sorbitol and gylcerine. High sorbitol mixes did the worst. My standard proportion gelatin fared the same with or without zinc, acrylic, or vinyl additives. I tried a couple of sealers including Green Marble, AquaNet, and Kryolan Sealer all of which helped initially, but eventually broke down with the gelatin underneath.
I have used my normal gelatin without additives, applied with Monster Maker's Pro Adhesive and sealed with PAX, for outdoor events that lasted several hours in summer weather. The only problems I have had with pieces coming loose (other than an odd edge here or there) is when the wearer couldn't resist stretching, pulling, and picking at it to see how strong it was.
These are all great observations. There is a problem with any nonporous medium (silicon ,too) that there is a hydroilic pressure to sweat so what we are talking about curing is the odd case where sweat and heat from the body cause the piece to go a little sticky and begin to come loose from the adhesive.
The example I gave from the Geraldo show was the worst and that was simple body heat and sweat from a man surrounded by people sworn to kill him. In the summer heat with hard working actor example , the piece stayed on but when I removed it was begining to get mushy but not to melt down.
In Jack Dawn's original patent for gelatin prosthetics ( not sure if Jeff Dawn or dick Smith passed it along to me) he mentions using formaldehyde to catalyze it, but several of us have tried it and have never been able to make it work. The gelatine just gets hard and cracks. Great to hear about better gelatin formulas.
Also in England I saw a wonderful piece that was made with mineral oil as well as the original formula but it really broke up with water, but was much softer and more like silicon.
TOPIC:
I was wondering if you can help me with the list for doing a gelatin prosthetic.
Doesn't hurt to have Zinc Oxide powder - but you CAN use Zinc Oxide Ointment if you can get it mixed into the gelatin well enough. Check my website for the two Gelatin articles and that will answer a few more questions. BEST glue - well actually if you prepare properly - with SWEAT STOP or TopGuard, then powder that, you CAN use Spirit Gum - which I know alot of people might disagree with but it does work very well. I've used it a lot. You can also use Telesis, Pros Aid or Premiere Products Beta Bond. The Top Guard or Sweat Stop do a lot to aid in adhesion as well.
The SWEAT STOP by Michael Davy will take care of the sweat but it's just a basis for applying the foam gelatin prosthetic. IT AIDS in adhesion (but you still must powder it before trying to glue the foam gelatin prosthetic on). THE HAIRSPRAY is a sort of sealor OVER the foam appliance but you should use something better. For instance you can use Spirit Gum to glue the appliances on (recommended for foam gelatin appliancees) but Pros Aid or Michael Davy's acrylic adhesive is also good including his WATERMELON for both gluing on and as the sealer stippled over the appliance and edges. Then you can powder it and then add makeup. What the sealer does is keep the makeup you use from absorbing into the appliance which often can make it look two different colors from the transition of prosthetic to skin. Hairspray is good for sealing water based makeups or other makeups that have been powdered down. It just keeps it from rubbing off easily. But it's NOT used as an adhesive. SWEAT STOP first, powder that. Then Spirit Gum or OTHER adhesive over that AND on the inside of your appliance. Allow to dry - powder and then if Pros Aid or other acrylic adheisve (reactivate with alcohol). If you use Spirit Gum you can apply it right away before the gum dries or you won't get it placed properly. But EDGES LAST so they don't get folded over or bunched up or something severe. Glue from the center out.
YES of course you can make gelatin molds from UC30 - do it all the time. Just got finished doing one. KEY IS that you USUALLY don't need VENT HOLES. Warm your molds slightly (the negative) before pouring your warm gelatin and then when you press the two halves together (naturally build in a respectable cutting edge and overflow just like foam latex molds) and apply plenty of constant weighty pressure on the molds when closed. CLAMPING would be good but adding a heavy heavy weight to the top of the mold (if made flat so you can do that) and leave it like that for a short while. CLAMP the molds if you can - best way BUT use something you can get into the fridge or freezer. USUALLY I've just used something heavy until the gelatin was slightly cooled and then I pop into freezer for about an hour. Powder liberally and what I've always ended up with are nice gelatin pieces with pretty fine, thin, thin edges that blend almost like foam latex appliance edges. But you're molds have to be made that way and I always do for gelatin. NEVER could get the Witch Hazel to dissolve any edges - hate that as well as PATCHING with Bondo. SO I always create them so they have tissue thin edges. You have to
VERY CAREFULLY remove them from the molds powdering liberally as I said but I've rarely ever had too much of a problem with that.
_______________________________________________
Offer to make some wound prosthetics for your local ambulance squad or hospital for their training drills, then ask for a gallon of 70% sorbitol solution in trade
![]() . Even if they charge you for it, it is cheap when a medical entity orders it from a supplier in a large container. The hospital I work for can get a gallon for what a pint would cost me at the local pharmacy and about what a quart with shipping would cost me from most FX suppliers. To keep this legit, a good portion of the sorbitol should go toward training in the facility, but the leftovers can be considered payment in kind. BTW, a half-gallon of sorbitol solution makes a lot of prosthetics.
. Even if they charge you for it, it is cheap when a medical entity orders it from a supplier in a large container. The hospital I work for can get a gallon for what a pint would cost me at the local pharmacy and about what a quart with shipping would cost me from most FX suppliers. To keep this legit, a good portion of the sorbitol should go toward training in the facility, but the leftovers can be considered payment in kind. BTW, a half-gallon of sorbitol solution makes a lot of prosthetics.
TOPIC: Blending edges
I've said it forever - and I mean this!!! HAHAHA!!! I HAVE NEVER EVER been able to make Witch Hazel dissolve the gelatin to blend edges. THAT is why I make all my gelatin and foam gelatin molds EXACTLY as I would foam latex molds - with short blending edges, tight cutting edges and super tight fitting molds so I can achieve short but paper thin edges - which I have ALWAYS been able to just glue down and they vanish.
Michael Davy once told me to try warming the Witch Hazel first and see if that helps. I must admit I've never tried that because by the time he told me about it, I have not run muchgelatin since and this last project I had (the Einstein) - I again made the molds with super thin edges possible so I wouldn't have to blend them. They glue down and disappear.
Try warming the Witch Hazel and see if that works. Otherwise, the best I would say you'll be able to do is Bondo so you can hide thick edges..GOT to hate that. That's the best I can tell you at this point. Not much else I can think of. Successful, thin edged gelatin appliances are all about not how much flashing you leave but that it's so thin you can read through it and then NO TEARING the flashing off. That super thin edge has to literally separate so it doesn't create an edge at all - and that's all in the mold making and sculpt.
______________________________________________________
But FXMan is right, its all about the edges. If you try to remove the flashing off a gelatinpiece, its trying to VERY CAREFULLY pull by the closest edge of the flashing than nearest the prosthetics edge. Its tricky.
Sometimes, I removed the flashing and get too close to removing most of the tissue thin edge. To cure thick edges, theres no choice than to seal with BONDO. I tried to carefully paint a warm thin layer of gelatine over a bad edge and make it off look like skin.
well, disolveing your edges with witch hazel is not going to compleatly eat away at it like acetone would on a viynel cap plastic edge.
its ment to fether off VERY good edges to the extreem, to just taper the very edges THAT must more to make it flawless.
so your edges basically have to be perfect on their own, and the witch hazel just takes it to the next leval.
some people use just warm water, even hot.
another thing I notice, soemtimes people use it the wrong way.
I a good way to disolve the very edge of your pieces is to take a q-tip dipped in your water or hazel and place the q-tip at the edge, then roll it with your thumb and pointer finger away from the appliance, and onto the skin. only roll it in that direction of course. keep repeting this at your edges pressing into your edge/skin.
TOPIC: General questions
what would be the best paints to use for gelatine once the appliances are glued to the peoples faces??
alcohol activated make-ups are great. my favorite to use.
butthinned down washes of rubber mask grease paint works fine.
Gelatin CAN be intrinsically colored using colored powders, flocking, ground up cake makeup, dry pigments and so forth. This allows for some translucency but keeps the coloration within the piece itself. You can color over it with alcohol based makeups like Illustrator Palettes, Tattoo inks, FW Inks, and other things as well. Won't take RMGP too well though as you've found out. The idea is to intrinsically color the gelatin and only add what other coloration you need over the top. The actors natural skin tones aid in filling in the other coloration. With props however, you have to be a little heavier with the intrinsic coloration process.
Hey Zodiac,
Well you know I haven't either. I don't think I've EVER seen someone specifically say what to do about thin edges. That's usually because I think most all gelatin pieces - edges especially - are often a bit on the dodgy side (to use one of our British brothers and sister's phrases). but as someone said, if you warm your molds before you fill them, and if you put a LOT of weight or mold straps to really tighten the molds together, that will more often produce good thin edges. But again, it depends upon your sculpt in the beginning and your mold making skills to produce superbly thin edges be it for gelatin, foam latex or whatever. And then the removal HAS to be done very carefully to NOT tear those edges. It just takes time and patience.
If you'll look around you'll find that actually there isn't a LOT of information at all aboutgelatin. I mean there is a smattering here and there but not a lot of definitive information about it at all. That's because it's not used as much and it's a relatively individual process. There are LOTS of formulas floating about but your question about which one is most often used, is difficult or nearly impossible to answer. Basically that stems from having to "make it work" by whomever is using it. Formulas might appear to be "basic" and widely used but I'll tell you they VARY quite a bit from user to user. So to say which ONE specific formula is most often used is likely impossible unless you did a major poll on the subject and gathered data that way and then determined from what you've found, which is the most used. But that could take forever.
Actually the thing to do is experiment since gelatin is so VERY cheap overall. That's really the ONLY way to come up with a superb formula for yourself - your own purposes. The Kevin Haney formula I WILL tell you this - I STILL have pieces sitting on the workbench that were made and sent to me by a friend of mine who used to live in Florida at the time, and that has been nearly 10 years ago. Granted they're dried out quite a bit (been kept in ziplock baggies) and they've yellowed with age. But you know what - you COULD get away with using them still after all this time. SO THAT formula has been one of my mainstays and rarely ever fails to produce good pieces.
If YOUR gelatin is too soft then you need to experiment by adjusting your dry components with your wet components. Means find a formula you know works, alter it to test it out, and adjust for whatever amount you're making at one time....all a matter of mathematics in quantity amounts. AND KEEP NOTES about EVERYTHING you do in formulation - that way you'll remember what you did once you hit on a formula that works best for you. Notice the "ratios" of Sorbitol and/or Glycerin to the amount of dry powdered gelatin you use. BE SURE to use 300 bloom gelatin or you're shooting yourself in the foot. Industrial strengthgelatin produces strong pieces. Of cours if you are rough with the gelatin pieces they're going to tear. They're pretty delicate appliances to use but they are inexpensive and you can do some nice things with them.
Well that was a lot to say - naturally you've figured out by now I don't give short answers to anything. Hate leaving anything out. But if you'd like I'll send you all the gelatin formulas I've gathered over the years if you want them and you can compare the ratios of components and see what is going to work best for you. If I'm not wrong you can even get 350 Bloomgelatin - though I've not looked nor have I found any just scanning around. But it's out there.
Good luck and keep up the research.
Well I've done alot of gelatin appliances in my short time of studying makeup, and this is how I best found to get great edges. I thouroughly warm my molds through and I don't take them out of the oven until my gelatin is ready to pour. I try to time the removal of the molds in the oven and taking the gelatin off the heat around the same time. I then spray in a good coating of PAM cooking spray on the negative and positives. I like to go a little overboard with the cooking spray and move it around with a chip brush all over the molds. I then blot out all excess spray with a paper towel. Sometimes even before I use the cooking spray I'll spray some epoxy parfilm on the negative and postives, not really sure if it has an effect, but I noticed the absorbtion of the cooking spray in a UC 30 mold decreased when I did this. Anyways, I pour in the gelatin. keep in mind I don't just fill up the mold all the way. Like Ross said its not nessecary. I then take a chip brush and quickly brush the gelatin up the sides of the mold staying away from the edges. This is just to work out air pockets mind you. I then press my positive into the negative and stand on the closed mold for about five to ten minutes. Yes I stand on it that long LOL, I want thin edges ! Then of course off to the fridge for a chill, then I demold. Every time I've done my appliances this way I've had great edges. I can pull out the positive and the appliance is just holding to the negative. My edges are so thin, they aren't even attached to the flashing almost all over the appliance! I then start to powder and demold by pulling away at the edges that are still attached to the flashing, no sense in destroying the papery thin edges.
On another note, the cutting edge is done fairly close to how you would create the cutting edge for a foam latex appliance. I also use a gelatin formula thats on the soft side, but not to the point where it would tear while pulling it out of the mold.
____________________________________________________________________-
Have you ever tried sealing your molds before applying the release? This will prevent the oil from penetrating the mold and allow the pieces to demold better. It should also help with getting better edges.
The double cutting edge is exactly what it sounds like. You first make the cutting edge around the sculpture as normal. When you have that finished, instead of making an overflow, you make a second cutting edge around the first as if it was the sculpture. Then do your overflow as normal. This does a few things for you. First off, it is another place for material to flow away from the sculpture in a controlled way and secondly it will also help keep your edges intact so you can store the gelatin piece with flashing attached. We all know how fragile gelatin pieces can be especially if you have to store them so this just helps a bit. I also like leaving my gelating attached to as much flashing as possible for application only removing the flashing just prior to application sometimes during the actual application.
Another thing that might be happening is that your cutting edge might be too tall. If this is so, it takes a bit more time to fill thus causing a bit of the thick edges to happen due to cooling. I usually limit my cutting edge to around an eigth of an inch. I have converted to a using a pasta roller for making my cutting edges and overflow for a few reasons. A: it's fast, B:, you are guaranteed a certain thickness of clay every time (even clay cutters mess up from time to time), and C: by reducing the size of the cutting edge you reduce the risk of breakage and help disperse the material a bit faster. The only thing you really need for a cutting edge is stone to stone contact (or whatever material you are using). As long as it is beveled it will help get the excess casting material away from the sculpture.
As far as coloring goes, my best results have been to get the intrinsic coloring as close as possible to the desired finished product using a combination of powdered makeup, flocking, and/or universal tints. The gelatine should be translucent. To test this (I think it was Bill that gave me this tidbit) lift your stirring stick and hold it so that a thin sheet of melted gelatine runs off. The sheet should be translucent in the center but opaque at the thicker edges. I use this technique for coloring silicone (for flesh) as well.
As I was sitting here at the comp reading the posts on the new lab, I grabbed my kit, ran downstairs and made a quick burn makeup. Just heated some pigmented gelatin, applied broken pieces of a dried seaweed sheet (the black in the pic) and although I usually soak it for awhile to give it a more fried flesh look, I didn't this time, then added some color and viola'! Other than heating the gelatin, the total time was somewhere around 15 - 20 minutes.
I have seen many burn victims in my career, and the closest I can come to to imitating totally burned flesh (the black) is with seaweed sheets - think sushi rolls - moistened with a light, light coat of powder. The pic doesn't do it justice, but I thought I'd post anyway. Flash tends to make things appear differently.
I guess my point is this: I've soaked the seaweed sheets and applied it while the gelatin is still fairly liquid on whole arms and legs and believe me, it looks very real. Just a tip for a quick burn makeup. Comments and critiques are ALWAYS welcome!
After moistening it I apply it over the top of a thin, colored gelatin layer, and seal it with a flexible sealer. It takes quite a while to dry out, but in those instances such as a whole arm or leg, if it is dry sometimes it may produce some cracking and slight rolling at the edges if it seperates, but the colored gelatin underneath then shows through. The cracking and rolling really add to the realism of the effect. It's not the perfect makeup for allot of action stuff, but it works in a pinch and looks as accurate as any real full thickness burn I've seen.
Bob
_______________________________________________________________________________________
MATTHEW MUNGLE SEMINAR ON GELATIN:
How-to and notes from a seminar given by Academy Award winning make-up artist Matthew MungleAbout These Notes... Who is Matthew Mungle?
Matthew Mungle has earned 3 Academy Award nominations and 1 Oscar ( for Bram Stoker's Dracula, 1992 ) for his work in special effects make-up. His credits include such hits asEdward Scissorhands, Natural Born Killers, Congo, Outbreak and Schindler's List. His most recent Oscar nomination was for his work with gelatin appliances aging James Woods in the recent hit Ghosts of Mississippi.What are these notes from?
These notes were taken during a seminar given by Mr. Mungle at this year's Make-up Artist Magazine's 'Make-up and Effects Trade Show' which took place Aug. 3rd in North Hollywood, CA. A thank you goes out to Rebecca Burt who contributed this to S.C.R.E.A.M.Notes: Why choose Gelatin?
Gelatin is more translucent and moves better than other materials. It also has a very realistic texture and takes a minimal amount of make-up to cover. Gelatin's drawbacks are that it breaks down from heat (melts) and sweat (disolves). There are solutions for the sweat problem, but not much can be done if you are working in a hot area.Molding
Use a mold of Ultracal or Epoxycal.
Epoxycal is better but also more expensive.
Use Epoxy Parfilm release.
Directions for Use
Gelatin Formula:
100 grams Sorbitol
100 grams Glycerine
30 - 20 grams Gelatin 300 bloom
+ any coloring, flocking, etc.
Mix and let set, preferably overnight.
Heat in a microwave for approx. 2 minutes, mixing several times.
Don't allow mixture to bubble or foam, because it will burn, change color and leave bubbles in your finished piece.
Carefully swirl and bump mixing bowl to get rid of any bubbles that may have formed.
Pour carefully into mold, as close as possible to the surface. The farther up you pour from the better chance there will be of trapped air bubbles.
Rock the mold from side to side, coating the full surface and allowing air bubbles to escape.NOTE: Only put escape holes in unused areas and flashing.
Press postive into place if you have one and band or weight mold.
Let cure.
Remove your positive, trying to keep the gelatin in the negative. Leaving your piece in the negative allows you to repair any bubbles easier.
Cut around flashing, leaving a small edge, and powder the inside of your piece.
Carefully find an edge and start removing your piece, powdering as you remove.
Piece Preparation
If applying the piece to skin you must build a barrier between the gelatin and skin (or sweat will disolve piece). For this you can use a light plastic over the areas of the piece that will be touching skin. - Eye pieces should be totally sealed.
After plastic sealing, cover back of piece (except edges) with Pros-Aide.
Dry and powder.
Application
If being applied to skin, clean area of application with alcohol.
Coat area with Pros-Aide and dry.
Press piece into place, starting in the middle and pressing outwards. Be careful not to trap any air bubbles.
Work on edges of piece. Cutips work well to give edges a coat of Pros-Aide.
After all edges are glued down, rub over edges with a little Witch Hazel. This breaks down the edges and blends it into the skin. - Don't use too much Witch Hazel or the appliance will break down too far!
Pull off any extra flashing bits and blend these edges as well.
Go over the edges with a little Pros-Aide to blend further and lightly powder.- For long durations, use a little of the same plastic sealer you used on the back of your piece around the edges as well.
Use paints like Stay-color (basically a light plastic with color) to match skin colors closer. - Alcohol can be used to blend these paints.
Use make-up as needed and add anything else (beard, stubble, etc.).
Removal & Tips
Use Detachol, Ultrasol, Isopropyl Myristate, or other remover.
Gelatin can be colored using tattoo colors, make-up, or flexable paints.
If you mess up during molding, gelatin can be remelted and used again.
Putting a few BB's in your pigment bottles will help stir them when shaken.
If you must move or store a gelatin piece: Leave it on the positive, and wrap it in plastic or seal it inside a ziplock bag. It's also a good idea to put some silica gel in with the piece (often comes in small paper packets in pill bottles or leather goods).
________________________________________________________________________________________
MAKEUP FX.COM INFO
GELATINE RECIPE:
Gelatine base recipe:
450 gram Glycerine, liquid (Buy it in a paint shop, pharmacy or a chemistry shop)
450 gram Sorbitol, liquid (Buy it in a paint shop, pharmacy or a chemistry shop)
150-200 gram Gelatine powder (A high quality gelatine is the best but the stuff you buy in a food shop is ok. Quality is measured in a ”bloom” scale and 300 is great for this!)Remember that gelatine is a natural product and can differ in quality so slight alterations in the recipe might be needed.
Mix the liquids and one tablespoon of water in a plastic or glass bowl.
Put it into the microwave on full effect (800 W) for 4 minutes
All times stated here might need to be changed to suit your microwave.
It is warm enough when you can’t put your finger in it without burning it. Gelatine melts in a temperature around 70°C.
Remember that you should never let the gelatine boil but just melt it.
The fibres in the gelatine are destroyed if it boils.
Add the powder slowly while stirring fast.
Let the gelatine powder absorb the liquid and swell for five minutes.
Put it back in the microwave for two minutes.
Open and stir a few times during.
Remember that gelatine is not allowed to boil!
Take it out and let it cool for two minutes and stir it often during that time.
Repeat the four minute procedure (heat+cool) somewhere between seven or eight times.
This is needed to thoroughly melt the gelatine powder.
You can put a little drop on a cool surface and feel how it feels when it's cooled down.
If it is all done it is a very soft but still firm (sounds weird but that is how gelatine feels when it's good).
Let the mix cool for a while before pouring it down in a zip lock bag (a thick one).
Put it flat on the table to cool.
The gelatine can now be re-melted whenever you need to use it.
Tip!
As you need to let the gelatine cool between the runs in the microwave, do two batches at the same time.
This saves you a lot of time.
Health and safety!
Gelatine is HOT! If you get it on your skin it will burn you until your skin comes off!
I always wear protective gloves, covered shoes, long trousers and protective glasses.
You can't play it too safe when working with dangerous materials.
(img:3712518525076)
FOAMED GELATIN
Gelatine is a very cheap material used in food and sweets. It has been used in makeup since the 1920’s. Today allergies are on the increase and the need for a safe product has also increased. Gelatine is a good candidate as everybody can have it on their skin. Everybody except vegans of course! They don't accept the use of it because it’s made from animal bones.I respect that and tried to find a vegan solution but the stuff they use (Agar agar) instead didn't work.So sorry, but at least I tried.
Some of the problems with gelatine have been that it is hard to glue it on skin, the appliances have been too heavy and putting melted gelatine straight onto skin may cause burns.
A lot of these problems are solved if you foam the gelatine first.
Click on the picture to see the difference between foam and ordinary gelatine.
The air in the foam makes it possible for glue to dry under a piece, the pieces will be much lighter and you can put it straight on the skin without burning you customer.
Of course some problems remain!
It’s much harder to get the edges to be invisible because it’s a living material that keeps moving and they are not as stable as foam rubber.When you foam the gelatine it turns white making it more difficult to paint realistically.Foamed gelatine collapses after a few days so you can't prepare pieces in advance.
If you can live with these problems then you should keep on reading.
To be able to foam gelatine you must first mix a gelatine base. See the separate page about this.
Foam gelatine recipe
Take 100 gram of the gelatine base.
Dissolve 1 teaspoon (5 ml) of Tartaric acid (food stores) in 1 teaspoon (5 ml) sorbitol in a little cup. You should always stay away from using water because it evaporates and makes the pieces less stable. Let the mixture stand for at least a minute.
Melt the gelatine in a big plastic cup (at least 5 dl so it won’t run over the edges later on).In a microwave oven 100 g will melt in 30-60 seconds.Once again be careful not to let it boil.
Stir down 1-6 teaspoons (5-30 ml) of white school glue (ex. Elmers in the US) with a plastic spatula or plastic spoon.This type of glue is vinyl based and will help the bubbles from breaking down.This will make the gelatine to be more stable and not collapse after cooling down.The more glue you use the more stable it will get but it will also get harder and less elastic.You will have to experiment to find a good mix for your purposes.
The reason why you should only use plastic tools is that cold metal tools inhibit the foaming process.
Now add the tartaric acid mix and stir quickly.
Now add 1 teaspoon (5 ml) Bicarbonate (food stores) and again stir quickly.
Now magic is happening! Let the mix rise for a while without stirring it. 30 seconds usually works fine..
The gelatine is foaming because the mix of tartaric acid and bicarbonate in combination with the heat produces carbondioxid (the same gas as you exhale).
The foam now needs to be refined for about a minute by slowly stirring before you use it in a mould or directly on skin.If it cools of to much during the process you can reheat it in the microwave for a couple of seconds.
Putting it directly on the skin
Foamed gelatine is excellent for making scars or burns on the skin or in the hair.It is much easier to remove from hair than you would think.Use a plastic spatula or brush to apply it. Test it on the back of your hand first so it’s not to hot!!
Most of the time you will not need any glue if you apply it to clean skin. I often clean it with a little bit of alcohol first). Let it dry for a minute or so before applying any makeup (PAX or grease paint) to it
Moulded pieces
The moulds should be prepared with a small amount of Vaseline first.Reheat the gelatine before putting it into the negative moulds.Put a weight on the moulds to make the edges really thin.
The moulds should now cool for at least 30 minutes before you take them apart.
If your moulds are complicated you can heat them to about 50-60 °C before putting the gelatine in. This is done to give you more working time before the gelatine starts to set.
Of course you will have to wait longer before taking them apart if you do this.
When the appliances are out wash off the Vaseline with some 96% alcohol.
The appliances can now be glued on with Pros Aide and the edges melted with Witch hazel. Apply PAX paint over them and finish them of with Ben Nye greasepaint.
The foamed gelatine is reusable a couple of times just by melting it again in the microwave. If the foaming disappears you can add some more bicarbonate and tartaric acid.
Reheating foamed gelatine is very quick and a couple of seconds is often more than enough. Remember that it is still not allowed to let it boil!
If you can’t get hold of the vinyl medium you could try to use white school glue or wood glue. They both have the same base as the medium but don’t work quite as well making the pieces more rigid and less flexible.
Direct applied foam gelatine over cheek and sideburn shaped as burn scar
________________________________________________________________________
from http://www.sapsema.org/gelatin1.html and http://www.sapsema.org/gelatin2.html
THE USE OF GELATINE FOR MOLDED PROSTHETICS
(c) Mitch Boudrot, 1998
All Rights Reserved
DISCLAIMER
The information contained within this article is presented in good faith. The responsibility for the use of any material in special effects make-up rests solely with the user. The author assumes no responsibility for the use or misuse of any material, or the informational content, discussed within this article.
PREFACE
At the request of my dear friend William G. "Bill" Barto (a.k.a. FXMan), I am submitting this article in the hope that it will encourage a free exchange of information among make-up artists and make-up enthusiasts, regarding the materials, techniques, technology, knowledge and ideas of our craft. This article will concentrate on the subject of gelatine (a.k.a., gelatin) and its historical, contemporary and future use as a medium in molded make-up appliances. The article will be presented in three installments. The first will provide some historical and background information regarding the use of gelatine in three-dimesional make-up. The second will address specific gelatine formulations, a discussion of formula components and molding techniques. The final installment will focus on utilizing molded gelatine prosthetics, adhesives, blending, sealing, etc., and the future of gelatine in three-dimensional make-up. It is by no means the most complete treatise on the use of gelatine for molded prosthetics. Rather, it is intended to provide information to make-up artists and enthusiasts interested in experimenting with the medium of gelatine. I hope that it will create an interest in a few readers who will take the information and "run with it," exploring and sharing the full potential of this medium within our craft.
INSTALLMENT 1
INTRODUCTION AND HISTORICAL PERSPECTIVE
Like many of my generation, my initial experience with, and interest in, gelatine as a make-up medium, came through the writing of the legendary master of special effects make-up, Dick Smith. Beyond describing a method for molding gelatine in his Do-It-Yourself Monster Make-Up Handbook (Dick Smith's Do-It-Yourself Monster Make-Up Handbook. Pittsburgh:Imagine, Inc., 1985.), Dick provides a brief overview of the historical use of gelatine for make-up, including: 1937 - oriental eyelids in The Good Earth, 1945 - a gelatine stomach for the actor Roger Livesay in Colonel Blimp, 1946 - Caesar's (Claude Rains) bald pate in Caesar and Cleopatra (Stuart Freeborn, make-up artist), 1975 - Dick's use of gelatine in the hand-cut-by-wire effect (Roy Scheider's character) in the Marathon Man, and a gouged-eye and cut-nose effect in The Sentinel, the following year. Dick also employed gelatine in The Hunger (a cutable stomach effect), and a rotting skull sequence at the end of Ghost Story, to name just a few examples.
There are, of course, other examples of the use of gelatine in special effects make-up. Stan Winston created gelatine appliances for Bernadette Peters and the late Andy Kaufman, for the 1981 motion picture Heartbeeps. More recently, Matthew Mungle rekindled an interest in the viable, and very successful, uses of gelatine make-up prosthetics - the age make-ups for the Ghosts of Mississippi. Readers, who attended the "First Annual Make-Up and Effects Products Trade Show" (August 3, 1997), in North Hollywood, California, may have had the pleasure of witnessing Matthew Mungle's use, and admirable application, of gelatine prosthetics during his seminar on the Main Stage. Additionally, readers of Make-Up Artist Magazine were recently enticed with an article, (Make-Up Artist Magazine, Issue #9, October/November, 1997. "Translucency Breakthrough: Foamed Gelatine," pp.52-55, by Michael and Lynn Key.), describing the progress of Michael Pearce and Dave DuPuis (of Steve Johnson's XFX) in the continuing development of foamed gelatine - possibly the "next generation" of gelatine appliance technology.
INQUIRING MINDS WANT TO KNOW
Why are make-up artists interested in gelatine as a medium for creating appliances? Why not rely solely upon foam latex? Compelled by the desire to reproduce lifelike characteristics in three-dimensional make-up, make-up artists continue to search for alternatives to foam latex. Not that anyone is necessarily opposed to foam latex, mind you. On the contrary, as the opportunity and need arises, I savor venturing into the studio and working with foam latex (both production and application). It is truly a phenomenal material. I am, however, also guided by the principle that "emphasis should not lead to exclusion." Therefore, any material, technology or technique, that enables make-up artists to potentially create the "ultimate in realism," should be explored in its entirety. That is, after all, the science as well as the art behind special effects make-up.
Before the advent of foam latex, make-up artists used gelatine in the creation of three-dimensional make-up and effects. But, gelatine, by itself, is an unstable medium for make-up prosthetics. In traditional formulas, gelatine tends to "breakdown" when it encounters perspiration. In other words, it melts and has the potential to become a terrible (and for the make-up artist - embarrassing) mess. Obviously, this is a "bad thing" owing to the close proximity of gelatine prosthetic make-ups to human sweat glands. Furthermore, gelatine appliances can be heavy - and heaviness in a make-up renders an unnatural look for any prosthetic. After the 1929 development of foam latex, and its eventual entry into the field of make-up, professional make-up artists adopted it as "the standard" (for lack of a better word) medium for prosthetic make-ups.
By its very nature, however, gelatine has certain inherent advantages not found in foam latex:
-
The first is that it is economical - gelatine is inexpensive, making it ideal for experimentation.
-
The second advantage is time. After foam latex is molded, it must be baked, usually for several hours. In contrast, gelatine has a relatively fast "working time" - here, I refer to the time period between material preparation and the finished product. After it is melted, it can be poured into the mold(s) and set aside to cool. Moreover, the setting time for gelatine can be shortened by placing the mold(s) in a freezer.
-
The third advantage is blending - making the prosthetic appear as a natural extension of the surrounding, living-tissue. Make-up artists have adopted numerous ways for dealing with the occasional difficult edge of foam and slush latex prosthetics. But, with gelatine, the edges are blended away (dissolved actually) with a moderate use of witch hazel astringent.
-
The fourth advantage is translucency. Gelatine is not opaque (while foam latex is), so it allows some underlying flesh tones to remain visible to the viewer. In an ideal situation, this would require less extrinsic coloring (make-up pigments) on the surface of the prosthetic, resulting in a more natural appearance.
-
The fifth advantage is found in gelatine's ability to move well (if properly prepared through sculpting, molding and application) on the actor or actress. It seems that the radiation of body heat into the gelatine prosthetic, allows it to move naturally with surrounding tissue and assume lifelike characteristics.
-
Finally, the sixth advantage is safety (when cool). Most, if not all, of the ingredients used in gelatine formulas are either food or medical grade quality. After all, gelatine is obtained from protein collagen, which is widely found in nature and is a major constituent of skin, bones and connective tissues. Furthermore, because gelatine is derived from a protein, it is essentially composed of amino acids. This is an absolute blessing for make-up artists, considering the potentially dangerous chemical compounds (hence the industrial rated precautions) found within the components of foam latex, urethanes, silicones and similar prosthetic materials.
The advantages of gelatine, especially its relative safety, cost and ease-of-preparation, make it an ideal medium for the neophyte or experimenting make-up artist. Gelatine affords an opportunity to gain invaluable understanding and experience in working with three-dimensional prosthetic media. This includes essential life-casting, sculpting, mold-making, material preparation and casting, application and coloring skills.
A discussion of the technical processes involved in life-casting, sculpting, mold making, etc., is beyond the intent and scope of this article. However, for those who are interested, there are many excellent resources available in both textural and video formats, including the following:
-
Smith, Dick. The Advanced Professional Make-Up Course. Connecticut: The Smith Family Trust, 1985-1996 (including Updates).
-
Baygan. Lee. The Techniques of Three-Dimensional Makeup. New York: Watson-Guptill Publications, 1988.
-
Corson, Richard. Stage Makeup. New Jersey: Prentice Hall, 1990.
-
Burnett, Michael. The Art of Special Make-Up Effects (Volume Two): Basic Foam Rubber Appliance (Video). California: Michael Burnett Productions, 1989.
-
Burman, Rob and Daniel Hobbit. The Videoguide to Special Make-Up Effects (Volume 1, Number 2): Techniques of Life Casting. California: VIDEFX.
-
Burman, Rob and Daniel Hobitt, The Videoguide to Special Make-Up Effects (Volume 1, Number 3): Sculpting & Molding a Prosthetic. California: VIDEFX.
-
Burman, Rob and Daniel Hobitt. The Videoguide to Special Make-Up Effects (Volume 1, Number 4): Foam Latex and Prosthetic Application. California: VIDEFX.
THE USE OF GELATINE FOR MOLDED PROSTHETICS
(c) 1998, Mitch Boudrot
<p>All Rights Reserved</p><p> </p><p>DISCLAIMER</p><p>The information contained within the context of this article is presented in good faith. The responsibility for the use of any material in special make-up effects rests solely with the user. The author assumes no responsibility for the use, or misuse, of any material, technique, or the informational content, discussed within this article.</p><p> </p>
PREFACE
In the first installment to this series, you were introduced (or depending upon skill-level, reintroduced) to the medium of gelatine (a.k.a. gelatin), and it's historical and current use for three-dimensional make-up effects. The historical aspect of gelatine is essential for an understanding of the medium, and it's eventual evolution and development in the field of special make-up effects. Additionally, the inherent advantages of gelatine over foam latex and other mediums were presented, including its relative safety, cost and ease-of-preparation. For the neophyte or experimenting make-up artist, these attributes make gelatine an ideal medium for gaining invaluable understanding and technical skill for working with three-dimensional prosthetic media. The technical processes involved in life-casting, sculpting, mold making, etc., are beyond the intent and scope of this series. For information regarding the "how to" of these skills, I refer the reader to the resources listed at the end of Installment 1.
<p>In this installment, I will present specific gelatine formulations, a discussion of formula components, and an example of molding gelatine for the production of prosthetics. Again, this series of articles is by no means the most complete treatise on the use of gelatine for molded prosthetics. Rather, it is intended to provide information to make-up artists and enthusiasts, interested in experimenting with the medium of gelatine. It is presented with the fervent hope of creating an interest in the minds of a few readers, who will take the information and "run with it," exploring, refining, using and sharing the full potential of this medium within our craft.</p><p> </p><p>INSTALLMENT 2</p><p>GELATINE FORMULATIONS, COMPONENTS, AND MOLDING FOR PROSTHETICS</p><p> </p><p>We recall from the first installment, that gelatine is obtained from protein collagen, which is widely found in nature, and is a major constituent of skin, bones and connective tissues. Because it is derived from a protein, it is essentially composed of amino acids. While this is a positive attribute for make-up artists (considering the frequently encountered and potentially dangerous chemical compounds found within the components of foam latex, urethanes, and similar industrial-rated prosthetic materials), it also identifies the inherent weakness of gelatine - it is "natural," and as such, susceptible to decay from the natural elements. This will become a key factor when we discuss gelatine formulations for molding prosthetics. But first, let me offer some terminology for working with gelatine.</p><p> </p><p>"BLOOM" STRENGTH</p><p> </p><p>In describing gelatine, manufacturers often refer to "bloom" strength. This is an industrial standard which "grades" or measures the strength of the gelatine. Essentially, it describes the relative "hardness" or "rigidity" of gelatine when cured. Higher "bloom" numbers correspond with stronger gelatines. Gelatine with a "bloom" of 300 can be obtained from most special effects suppliers, including Burman Industries, Inc. (www.Burmanfoam.com), The Monster Makers (www.Monstermakers.com), and others, and is considered to be the strongest for use in three-dimensional make-up effects. The Nabisco™ Food Service Company produces Knox(\(\(\(\(\(r) unflavored gelatine, which is readily available in the United States. An equivalent to Knox(\(\(\(\(\(r) in the United Kingdom is Davis(r) unflavored gelatine. Both brand names can be purchased from grocery stores, pharmacies or food service companies (in addition to its use as a nutritional supplement, it is also used in confectionery recipes - including those wonderfully molded gummy bears, fish and worms). Both Knox(\(\(\(\(\(r) and Davis(r) brand gelatines are believed to have a "bloom" strength between 200 and 225, and can be used during experimentation in three-dimensional gelatine effects.</p><p> </p><p>"HYGROSCOPIC"</p>
<p>Another term used to describe gelatine is "hygroscopic." Hygroscopic refers to the property of certain materials (like gelatine) to absorb moisture from the atmosphere. Hygroscopic is a necessary property for gelatine, because it allows the gelatine to become soluble (the capacity to liquify or dissolve). With the addition of water, as in most traditional (non-special effects) applications, gelatine particles begin to swell and actually absorb between five to ten times their weight in water. Because of the hygroscopic property of gelatine, traditional gelatine formulas for molded prosthetics and effects, swell in proportion to changes in humidity, and shrink with the onset of evaporation and time. This instability of gelatine formulas is another inherent weakness, and will become evident to anyone who uses a formula similar to the following:</p><p>1 package of Knox(\(\(\(\(\(r) unflavored gelatine granules to 2 tablespoons of very hot water.</p>
(NOTE: A Knox(\(\(\(\(\(r) package of gelatine granules is equal to approximately two level teaspoons)
<p>This formula works well in simple, quick, three-dimensional effects, but is not suited to our needs in using gelatine for molded prosthetics.</p><p>In addition to being artists, we must also become scientists, and base our experimentation in observation. If the addition of water is responsible for these changes, we must keep our "water to gelatine" ratios low, or eliminate water from the formula entirely. The goal is to have stability in the formula, without sacrificing flexibility or elongation of the gelatine molecules. Fortunately, we don't have to "reinvent the wheel" in this aspect. Make-up artists like Dick Smith, Kevin Haney, Frank Rogers, Matthew Mungle, and a host of others, have pioneered the way, and provided invaluable insight into the chemistry and nature of gelatine for use in three-dimensional make-up and prosthetics.</p><p> </p><p>GLYCERIN (GLYCEROL)</p><p> </p><p>One of the solutions that grew out of early experimentation with gelatine for three-dimensional make-up, was to replace a percentage of the water content of traditional formulas with glycerin (glycerol). Glycerin, available in local pharmacies and grocery stores, is obtained from natural fats and oils, and is used in everything including cosmetics, inks, perfumes, certain glues, in automotive antifreeze, as a skin emollient and is used in the preservation and sweetening of food. In addition to its use in the make-up industry to produce "perspiration" and "grease" effects, glycerin entered into the basic gelatine formula, as in the following:</p><p>1 part gelatine, 2 parts water and 2 parts glycerin.</p><p>This formula resulted in gelatine with properties similar to many of the pre-packaged "gelatine effects kits" available on the market, but not specifically suitable for prosthetic work. With the addition of minute amounts of food coloring (red, blue or yellow), a multitude of injury effects could be created utilizing this formula - ranging from cuts and swellings, to bullet hits and burns - especially if the injury was created through the artful application of colored gelatine in layers (e.g., one red layer, one yellow layer, one clear layer, etc.). The gelatine could be mixed, colored, and stored in plastic squeeze bottles. When it came time to create the effect, the bottle could be placed in hot water (or while on set, in a hot cup of coffee), and allowed to liquefy. To assure that you didn't burn the actor, you always tested the temperature of the gelatine BEFORE application. The effect could then be sculpted directly on the actor, using a finger, brush, spatula, cotton swab or craft stick.</p><p>Interestingly, glycerin is also "hygroscopic." Kevin Haney, who has done considerable research for the use of gelatine in three-dimensional make-up, made a valuable observation* regarding this "hygroscopic" characteristic, during his use of gelatine burn appliances on the set of THE BELIEVERS. Kevin was working in rainy conditions, when one of the actors informed him that a nose appliance was loosening. When Kevin attempted to secure it, the appliance appeared larger than it should be. After successfully re-gluing the prosthetic, Kevin went back to his trailer to check his spare appliances and found that they were 10% larger when he compared them to the negative molds. His observation led him to believe that the appliances were swollen as a result of the high humidity. As a result, he began to replace some of the glycerin in his formulations with sorbitol, which is less affected by humidity changes, and is another component we should examine.</p>
*(As submitted by Kevin Haney, published in Dick Smith's Advanced Professional Make-Up Course, Update #3, page 4. Kevin also notes that sorbitol makes gelatine firmer and less elastic. At the time of THE BELIEVERS, Kevin used a formula which included 7 grams of gelatine (275 to 300 bloom), 38 grams glycerin, 2 1/2 grams water, flocking, face powder and zinc oxide.)
<p> </p><p>SORBITOL</p><p> </p><p>Sorbitol is obtained from the breakdown of dextrose, and is used in the manufacturing of Vitamin-C supplements, candy, varnishes, synthetic resins, and as a sugar substitute for diabetics. While it occurs naturally in certain fruits, it may also be derived from corn syrup. Sorbitol increases the structural rigidity of gelatine formulas, thereby improving its tear resistance (an essential element for prosthetic work). There are two forms of sorbitol - liquid and powder. The inherent problem with the powder form is that you have to "tweek" the proportions of water to cause the sorbitol to dissolve into a solution - and water brings us back to "instability" in a prosthetic formula, with regard to changes in humidity. I have been successful with concentrations as high as 70% water to 30% sorbitol powder - with the expected drawback of appliance shrinkage over time (the process of evaporation). The liquid form of sorbitol usually contains higher concentrations of sorbitol to water, just enough to form the sorbitol solution. Liquid sorbitol can be obtained from Burman Industries, Inc., Michael Davy Film & TV Make-up (www.classichippie.com/davy/) and other suppliers (you may also be lucky enough to find it in your local grocery store or pharmacy). The powder form can be obtained through The Monster Makers. (Just a quick thought - you might also try mixing the sorbitol powder into glycerin to form a solution, eliminating water from the formula entirely).</p><p> </p><p>ZINC OXIDE</p>
<p>One of the last formula components I would like to discuss is zinc oxide. To resist the breakdown of gelatine due to body heat and perspiration, make-up artists have found that the addition of zinc oxide to the formula actually results in a stronger gelatine prosthetic, with a greater tolerance to temperature changes. Zinc oxide is a water-insoluble powder (i.e., incapable of being dissolved in water), and may be available at a local pharmacy. However, the addition of zinc oxide will begin to effect the translucency of the gelatine in the final product - be careful of your proportions.</p><p>Because I was unsuccessful in locating powdered zinc oxide in a pharmacy, during my initial experimentation with gelatine, I utilized the next best thing... zinc oxide ointment. The particular brand of zinc oxide ointment that I used contained 20% zinc oxide, light mineral oil, white beeswax and white petrolatum. It produced very promising results. In fact, I have gelatine pieces in my studio that have survived the Florida heat and humidity for over six months now, without any sign of mold, mildew or rot (remember what I wrote at the beginning of this installment - gelatine is "natural," and as such, is susceptible to decay from the natural elements). The only change in the pieces is the development of a slight yellow tint, coupled with shrinkage (due, in part, to the 70% water to 30% sorbitol powder solution).</p><p> </p><p>THE HANEY FORMULA FOR MOLDING PROSTHETICS</p><p> </p><p>To produce those pieces, I used a variation on the following Kevin Haney* formula:</p><p>9 to 11 grams gelatine (275 to 300 bloom)</p><p>(Remember: the higher the "bloom," the greater the tear resistance)</p><p>21 grams sorbitol (70 %)</p><p>20 grams glycerin</p><p>up to 1/4 gram zinc oxide</p>
*(As submitted by Kevin Haney, published in Dick Smith's Advanced Professional Make-Up Course, Update 3, page 5. NOTE: the components of colored flocking and colored face powder are not included in the referenced formula, as these topics will be addressed in the final installment to this series.)
<p> </p><p>A SIMPLE MOLDING PROCESS FOR GELATINE PROSTHETICS</p><p> </p>
PHOTOGRAPH 1 - ULTRACAL NOSE MOLD
<p>Most make-up artists who "run" gelatine prosthetics, usually utilize (positive and negative) epoxical molds (Matthew Mungle), silicone or urethane (negative), or Ultracal (gypsum) molds. Because I run foam latex in Ultracal-30 molds (with Acryl 60 added), my initial experiments with gelatine appliances were conducted using Ultracal molds (positive and negative). For example, Photograph 1 illustrates an Ultracal-30 nose mold. The positive (left) is a "snap" relief from a life cast. The negative (right) is a mold of a sculpted (Roma Plastilina) nose. You will notice the "cutting edge" and "overflow" area on the negative, indicative of a mold made for foam latex work.</p><p>Although I have successfully run gelatine prosthetics without a separating agent, most sources recommend a microscopic layer of petroleum jelly on both mold surfaces. If you use vent holes in the mold, be sure to apply the petroleum jelly in these areas as well.</p><p>I heat the formula (provided above, with slight modifications) in the microwave, stirring occasionally to avoid uneven heating and literal cooking of the gelatine - if the formula gets too hot you may never be able to use it. You can also use a double-boiler to melt the formula. While I would love to give you a time for either technique, that will depend largely upon how many "batches" you are running, your components, and the power of the heat source (microwave or conventional cook top). So, I'll leave that to your observation. When the formula liquifies, and all of the components mix together, the formula is ready for pouring into the mold. When pouring, pour close to the mold to prevent splashing and the trapping of air bubbles.</p><p>CAUTION: THE FORMULA IS HOT AND WILL BURN!</p><p>FOR THIS REASON, IT IS RECOMMENDED THAT YOU WEAR LEATHER GLOVES AND EXERCISE EXTREME CAUTION!</p><p> </p><p>After pouring the mixture into the Ultracal-30 negative, I carefully place the positive over the negative, and apply slow, constant pressure until the positive is seated firmly into the negative. Excess gelatine will overflow from the negative, and pool in the overflow area of the negative. Set the mold aside to cool (perhaps as long as thirty minutes to a few hours - depending upon the size of the mold). To decrease the cooling time, the mold can be placed in the freezer.</p><p> </p>
<p>PHOTOGRAPH 2 - THE MOLDED PROSTHETIC</p><p> </p>
Photograph 2 depicts the cooled prosthetic, ready for demolding. Be careful when prying the mold apart that you do not tear the appliance or crack your mold. In Photograph 2, you may be able to see the prosthetic "flashing," which is just as fine as that produced by a foam latex appliance. To prevent the gelatine from adhering to itself, I powder the piece with corn starch baby powder (it's less expensive than neutral set powders). The overflow (or flash) of the piece should remain with the prosthetic until the time of application. The nice thing about gelatine is that it "forgives" - if you make a mistake during the molding process, or you don't like what you see - just re-melt the gelatine and try again.
<p>PHOTOGRAPH 3 - A MOLDED AND DE-MOLDED (COLORED) GELATINE PROSTHETIC</p><p> </p>
The process of molding a gelatine prosthetic described in this installment, produces a strong, elastic, semi-translucent appliance, which is flexible, has inherently good resistance to perspiration and heat, and retains superb definition of detail from the mold. In fact, many artists who use gelatine remark that the retention of detail is another positive factor for using gelatine. Experiment for yourself and see the results first-hand.
<p> </p><p>In the final installment of this series, I will focus on the utilization of molded gelatine prosthetics, including adhesives, blending, sealing, intrinsic and extrinsic coloration, flocking, etc., and the future of gelatine in three-dimensional make-up.</p><p> </p><p>CREDIT WHERE CREDIT IS DUE</p><p>Like many make-up artists of my generation, I stand on the shoulders of giants in the industry - those courageous souls who have pioneered the research, formulas and techniques of special make-up effects. I am eternally grateful to Dick Smith, who granted me permission to publish sections from The Advanced Professional Make-Up Course*, specifically for this article. All references are protected under international copyright laws. I am also thankful for the work of Kevin Haney, Frank Rogers, and Matthew Mungle, among many others - for their inspiration and generosity in sharing what they have learned with the rest of us.</p>
*Smith, Dick. The Advanced Professional Make-Up Course. Connecticut: The Smith Family Trust, 1985-1996 (Including UPDATES).
A method of how to prevent sweat from affecting an appliance
The idea of making your own flocking from crepe wool
I really like this suggestion - I may consider this for future experience
Other ways of trying to achieve and blend better edges
Methods of colouring gelatin
Mixing, application and removal methods as well as recipes.
How to get really good edges
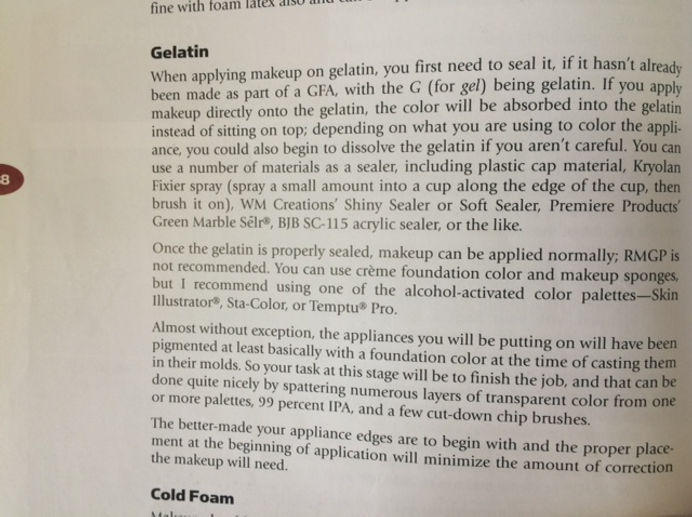
Debrecini, T. (2009) Special Makeup Effects. UK: Elsevier Inc.
This is Todd Debrecini's advice for using gelatine for prosthetics.
I didn't realise that gelatine absorbed makeup when you paint is, so I now know to seal all my appliances before painting.
© 2023 by Tennis Lessons with Karen. Proudly created with Wix.com