
Foam Latex
As a material for making prosthetic appliances for special makeup effects, foam latex is, in my opinion, unrivaled for performer comfort. It is incredibly light, strong and durable. Silicone does not breathe, and an active actor wearing silicone appliances will begin to perspire rather profusely beneath the silicone if it is worn for an extended period of time. Gelatin can actually start to melt after being worn for a long time. Appliance materials must be chosen based on numerous factors such as climate, shot framing, performance, and budget. When foam latex is made well, it feels like velvet, and every subtle expression and nuance of emotion is translated beautifully through the foam from the performer; it becomes the performer. A nearly full face appliance will likely weigh less than an ounce and, when applied, is almost undetectable by the actor wearing it. Its ideal for bid suits and fantasy creatures.
Moulds: Foam can be run in a variety of moulds, including gypsum, fiberglass, plaster, and epoxy. Ultrcal is porous, so it needs to be properly sealed and released to prevent the foam latex from adhering to the mould. Every bit as important as sealing and releasing the mould is making certain there is no moisture left in the mould before baking foam latex in it.
Drawbacks: However, although foam latex is extremely light, strong, breathable, and expressive, there are some qualities that could be construed as negatives by some. First, foam latex is opaque. To create the semblance of translucency, the appliance must be painted with numerous transparent layers of pigment, usually with an airbrush, to achieve the look of real skin. Second, foam latex requires a heat cure in an oven, and it cannot be the same one used to cook food. Why? Because third, foam latex gives off toxic fumes during the heat cure that will render your oven forever unfit for cooking. One alternative is building your own makeshift oven using infrared heat lamps in a well insulated plywood box. Foam latex should cure in an oven that cannot exceed a controllable 200'F. Ideally foam should cure no hotter than 185'F (85 degrees). Lower temps (150'F-ish) for an even longer time will result in softer foam. It should be left in the oven for about 5 hours. Foam latex shrinks. The thicker the foam, the more it shrinks. That's not to be confused with the volume of the foam; lower-volume foam (heavier) will shrink more than high-volume foam (lighter) because it has more air and a lesser proportion of foam latex componants. It is water loss that causes shrinkage in the foam. Because higher-volume foam stretches more than denser, lower-volume foam, any shrinkage that does occur can usually be compensated by stretching, with a little force exerted on the foam. What the mould is made of also contributes to the shrinkage of the foam or the lack thereof. A porous mould, like Ultracal will cause the foam to shrink less because it absorbs moisture from the foam. Latex goes off after about 6 months.
Colouring: Skin Illustrator, powder, acrylic paints and special pigments can all be used to colout foam latex. Pax paint is usually used to paint it. Tha flange can be trimmed with scissors.
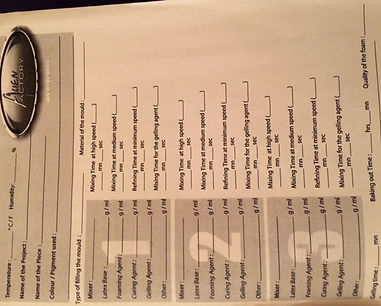
Method
It can be helpful to work with a sheet with times and measurements on to help keep track of everything, as it can get confusing
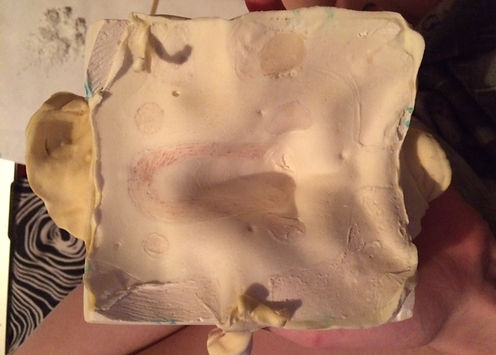
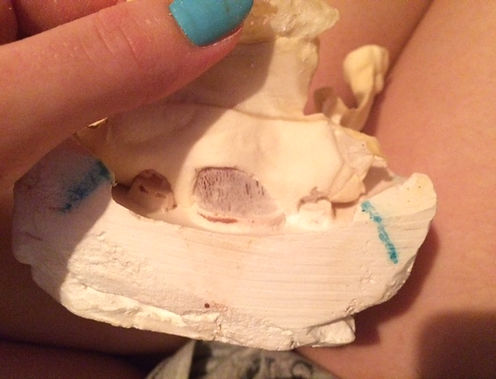
Before you start mixing the foam latex, its important to ready the mould. For our small, plaster moulds, we marked match-up lines on them with sharpies, so that they could be accurately aligned for accuracey. The mould release is obviously dependant on the mould, but vaseline can never be used as it doesn't work with foam latex. For plaster moulds one layer of zinc sterait or solid soap works well. For silicone moulds and fibreglass, spray on one layer of display mount or spray glue.
A typical batch of foam latex consists of a cream latex base (this is different to normal liquid latex), which is specifically mixed with other products (ensure to shake it well before pouring). To this you add a foaming agent; 20% of the amount of latex you have and also 10% of the curing agent, which gives it the sponginess. Also weigh out 10%-14% of the gelling agent. This is added after the other products have been mixed and the amount depends on the temperature of the workplace and the weather; the colder it is the more gelling agent you will need. This helps the foam to set before you put it in the oven. The products are mixed in a mixer, such as a KitchenAid mixer used for cooking. The latex base, curing agent and foaming agent are mixed for about 6 minutes. The gelling agent can then be added and another 3 minutes of mixing ensues.
When the batch is mixed, use a brush to start applying the latex into the mould. Fill it up with more than is needed so it can fill all the spaces and bleed out. Hitting the mould against the work surface can help any air bubbles to come to the surface. Then the two halves of the mould can be pressed together and left for about 10-30minutes to cure. Pressing the foam with your finger and seeing if it springs back, is enough to know whether its ready to be put in the oven or not. Non-porous moulds tend to take longer to cook. It works out about 1 hour per cm of plaster mould in the oven, and 1 hour per mm for a fibreglass mould. As our were only small moulds, they were only in the oven for a couple of ours. Turn the oven off and let the moulds cool a little before removal, otherwise they could break if they're suddenly brought to room temperature. Using a finger again, make sure the foam is fully cured by seeing if the foam springs back. Use lots of talc with a brush upon removal, as unpowdered latex, especially thin sections, will stick to itself and can totally distort a piece.
When the piece has been removed, it must be washed before colouring and application due to the chemicals. It should be washed several times in warm water and fairy liquid. The chemicals should be squeezed out and gloves should be worn during this process. This should be done until the water runs clear, and then wash the piece a couple of times just in warm water. The piece should, if possible, be put back on the positive mould whilst drying. FOm latex can be applied with prosaid and although it cannot be blended, bondo can be used to smooth edges.
Alternatively: Rather than just pouring the latex into the mould, it can also be injected. It is injected through a hole in the positive mould and exits through bleeder holes in the negative mould. These are filled in with water-based clay during the process, as wax-based clay melts when put in the oven.
Debrecini, T. (2012) Special Makeup effects for stage and screen: making and applying prosthetics. 2nd edition. United Kingdon: Taylor & Francis


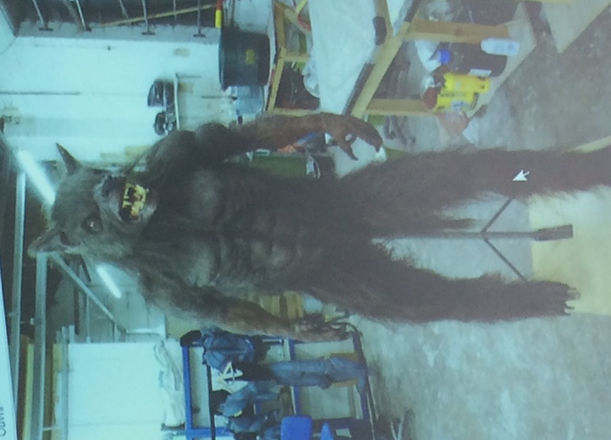


Being Human, Werewolf
Giles Paillet worked on 'Being Human 2' and worked on the 3-part chest and face mould used for the werewolf. He said that the actor had approximately 2 inches of foam around his arms, but could still achieve good movement.
Being Human Werewolf. (2010) [online image] Available from:http://werewolf-news.com/page/56/?b=txt-2 [Accessed: December 28th 2014]


This is the foam latex that Giles recommended, and is renowned for its quality in industry. "You've seen it featured in Academy Award winning The Chronicles of Narnia: The Lion, The Witch and the Wardrobe, Land of the Dead, Planet of the Apes, Men in Black 2 and dozens of other feature films and TV's shows. Top foam runners agree that there is no finer product of its kind available today. Used throughout the world by top industry professionals, The Monster Makers Foam Latex is unmatched for its quality, dependability and stability. Its unique Chemistry yields a velvety soft foam with extremely fine cells. This makes for beautiful prosthetic blending edges and precision detail reproduction. The Monster Makers Foam Latex System is suitable for a wide variety of applications ranging from stop motion puppets, prosthetic makeup-appliances, creature suits to large animatronic characters for film and television. Each kit comes complete with detailed instructions and all the necessary components for making foam latex. This is our Prosthetic Grade Kit that offers the finest cell size with great stability. Makes great blending edges! Can be baked in molds made from aluminum, stone, fiberglass, epoxies and silicone. Monster Makers Foam Latex is a very economical choice for all sorts of creature and make-up effects and foam is still considered the backbone of the make-up F/X industry."
This is one of the rejected hands from the being human werewolf, as it was coloured too green. It's obvious that foam latex can pick up an incredible amount of detail. Power netting was used in these arm pieces to make the piece stronger; Giles said if you spray display mount on the core, then the foam latex will grab onto it so that the netting will be on the inside. Another way of making a piece more resiliant is to use the base latex like normal latex and paint a few layers into the mould before pouring in the rest of the mix, which will create a slightly stronger front to the piece. When the rest of the mix is poured in, it will fuse with the latex fine. Foam latex felt a lot lighter than I expected and much more soft and spongey.
This piece on the right was another one that Phillipe ran and has been painted for Dr. Who. He said that the glossy finish can be achieved with Permawet: "high solids gloss coating which boasts the highest shine in the industry. Forms a tenacious, highly flexible bond while sealing and waterproofing the mask. Has a 600% elongation. Used primarily to simulate realistic wet areas on props and masks. Can also be used on urethane foams and urethane rubbers which can be difficult surfaces to paint."
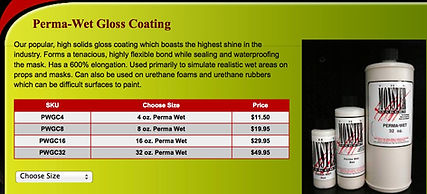
The Monster Makers. (2014) Perma-wet gloss coating [online] Available from:http://www.monstermakers.com/product/perma-wet-gloss-coating.html [Accessed: December 29th 2014]
The Monster Makers. (2014) Perma-wet gloss coating [online] Available from: http://www.monstermakers.com/product/the-monster-makers-foam-latex-system-5-gallonProsthetic-Grade-Kits.html [Accessed: December 29th 2014]
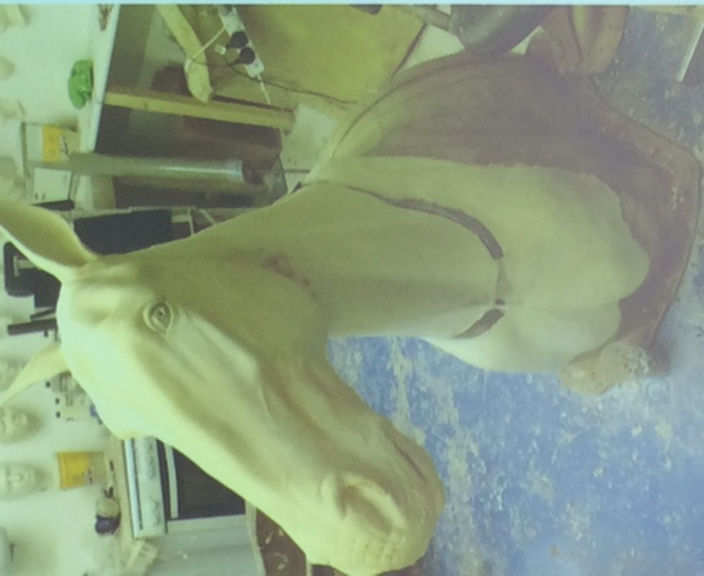
War Horse
"Most of the scenes in Steven Spielberg's World War I epic War Horse use real horses, but a couple of particularly animal-unfriendly scenes required the use of animatronics. Wired.co.uk discovers how special effects company Neil Corbould SFX, which has created mind-blowing effects for movies such asGladiator, The Day After Tomorrow, The Fifth Elementand Saving Private Ryan, created its startlingly-realistic steed.
Adrian Parish, one of the mechanics that worked on a team of more than a dozen sculptors, puppeteers and engineers to bring the horse to life, explained: "Our brief was to provide a realistic horse that could sit in mud and barbed wire for an extended period of time, something that would not be safe or possible with a live animal."
One scene featuring the animatronic horse was where equine protagonist Joey gets caught in barbed wire in no-mans land between the German and British trenches.The horse was placed on a very busy, wet and muddy set in a disused airfield in Surrey designed to look like the battlefield of Somme during WWI.
The team decided it was best to build to build a puppet that could be manipulated from beneath using control rods. As the mechanism was to be bured underneath the creature, they decided to avoid complex hydraulics and keep it simple so that there were fewer opportunities for technical failure.
Underneath the horse puppet was a box in which four puppeteers could sit and manipulate the creature's body and head, creating movements including breathing. "A household kettle was also installed in the box that had tubes running between it and the nostrils to give the illusion of condensed breath," Parish added.
The head part of the puppet was radio-controlled and contained 25 servo motors to control the eyes, eyelids, ears, brows, lips, nostrils and jaw. The head alone took three puppeteers to control -- one to operate the eyes, one for the mouth and one for the ears. This team didn't have to cram into the buried box, but were above ground, able to observe their handiwork.
The skin was created using a full size clay sculpture of the horse. A moulded fibreglass shell was covered in a centimetre-thick layer of clay, which was then covered in another layer of fibreglass. Once all the layers had set, the clay was removed from between the two fibreglass layers and replaced with an injection of foam latex. The skin's fine seams had to be very carefully removed before painting and the whole thing was fitted over an articulated fibreglass skeleton.
The final stage was to flock the horse to give it its shiny fur. This process involved applying a layer of polyuerthane glue, onto which small artificial hairs were applied. An airbrush was then used to blow the hair into the desired direction before the glue set. The final touches came with the addition of fine hairs around the mouth, ears and brows that were set individually. Then the eyelashes were applied and the whole thing was airbrushed once again.
Once the puppet body and animatronic head were complete, they were set in position and dressed with barbed wire and fake blood and scars. "

Neil Corbould SFX. War Horse. (2012) [online image] Available from:http://www.wired.co.uk/news/archive/2012-01/24/war-horse-animatronic-puppet {Accessed: December 28th 2014]
Wired, (2012) War Horse [online image] Available from:http://www.wired.co.uk/news/archive/2012-01/24/war-horse-animatronic-puppet {Accessed: December 28th 2014]
My piece:
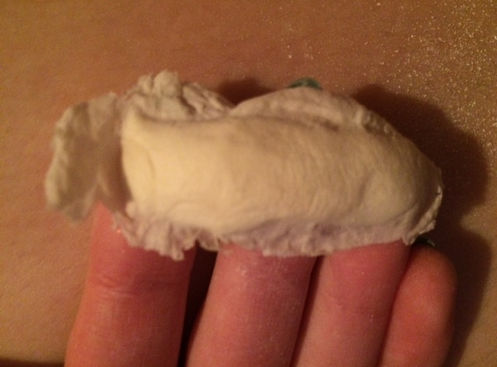
My mould was initially really difficult to get open, despite the fact I used a lot of mould release. I made sure to powder it a lot upon removing the piece from the mould. I think it came out better than my previous attempts with silicone, in that the edges are definately thinner. The only aspect which I don't like it that when I poke it with anything, it seems to slightly retain the shape which is odd.
© 2023 by Tennis Lessons with Karen. Proudly created with Wix.com