
 image3.jpeg |  image6.jpegCasting my models face in silicone so that I can fibreglass onto it. |  image7.jpegIt came out more indented that I'd anticipated, but I can sand down the fibreglass to make it smooth enough to sculpt onto. |
|---|---|---|
 image1.jpeg |  IMG_3864.JPGI sanded down the fibreglass piece until it was ready to be sculpted onto. |  IMG_3865.JPGSculpted horns with grounding up finished. I used a stipple sponge to add texture to the skin area and also applied a few pores, as I wanted the skin around the horn to look a little rough so it was congruent with the horn. |
 IMG_3867.JPGI used 3 layers of carnuba wax (dried and buffed) and a spray of epoxy parfilm as mould release before fibreglassing the piece. |

Stage 2 Horns
This is my stage 2 horns process. I am doing these horns as 2 individual prosthetic pieces because then they will be easier to apply when it comes to application. The horn and skin are one prosthetic though, unlike the method I am doing for my stage 3 horns.
These slides show to process up until moulding the piece.


Prior to moulding the piece, I applied 3 layers of carnuba wax to the fibreglass forhead cast, letting each layer dry and buffing it in in between each application. As fibreglass sticks to itself, this process is important, as otherwise the mould won't open.
Fibreglassing around the horns was slightly challenging. Because I sculpted them in chavant clay, I was worried about being to rough when applying the fibreglass in case it spoiled the detail or distorted the shape. Shapeing the fibreglass around a spherical shape is also not easy, and I was worried about the ends of the horns being pushed down, but at the same time I wanted to manipulatre the fibreglass correctly around the shape for a neat mould.
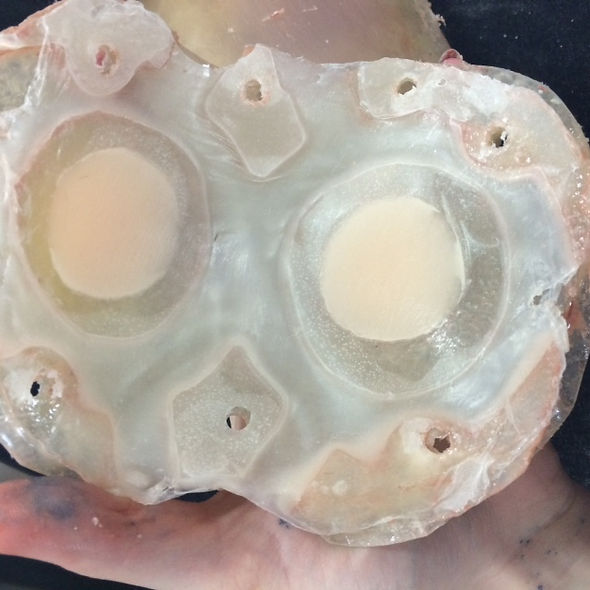
The mould came out well, although I was scared it wasn't going to open initially (as it felt welded together) with a little coaxing after inserting a screwdriver in between the two halves and applying pressure, it soon came apart.
Unfortunately I parted the mould before drilling the holes. So before cleaning it out, I tried as best I could to hold to mould together while I drilled the holes and then proceeded to clean it out. I also used a vibrosaw to neaten up the edges and expose the ends of the flow outlets.
My first attempt running the horns was very unsuccessful. After buffing 3 coats of carnuba wax into the mould (and on the fibreglass forhead) I applied about 5 coats of IPA and encapsulator (3:1 ratio). I also applied 2 layers to the fibreglass forehead.
I then mixed up the silicone with 100% deadener. I didn't realise at the time, but this was foolish, as horns are so rigid, I could've mixed the silicone with no deadener. I coloured it with skin coloured silicone pigment for the skin area of the piece.
I tried just pouring the silicone into the mould (as experimentation, I had planned to try injecting it later already) and it was very messy and wouldn't stay in any areas of the grounding. I managed to close the mould and screw it shut. I left it for about 30 minutes, confident that it would be dry. When I opened it almost all I could see was cap plastic encapsulator. Somehow the silicone had actually nearly filled the horn area, but the silicone hadn't cured and there were obvious air bubbles.
I will try injection moulding next.

Injection Moulding with Gelatine
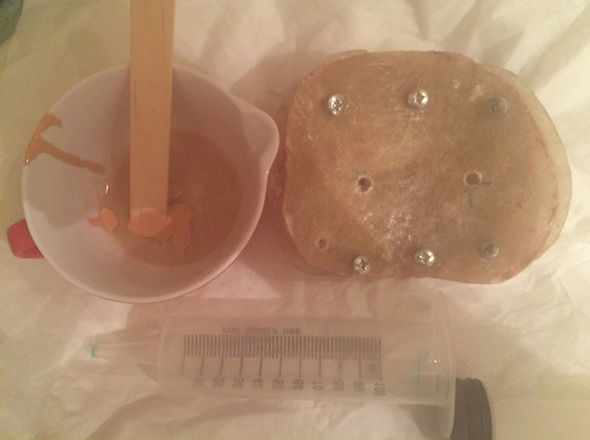
Before injecting this mould with silicone, I thought I'd try it with gelatine first.
I drilled 2 injection points, one for the centre of each horn, and I thought with just one injection site, the materia; wouldn't spread to the tip of the other horn.
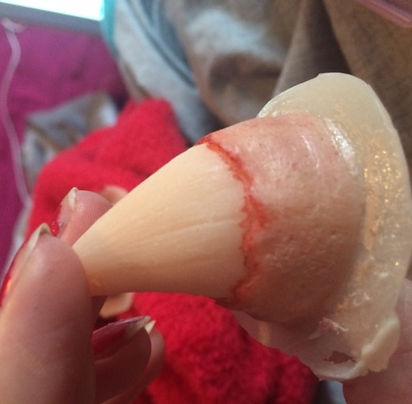
I used vaseline as a mould release, which worked really well. I coloured the gelatine with silicone pigment for the skintone area beneath the horns.
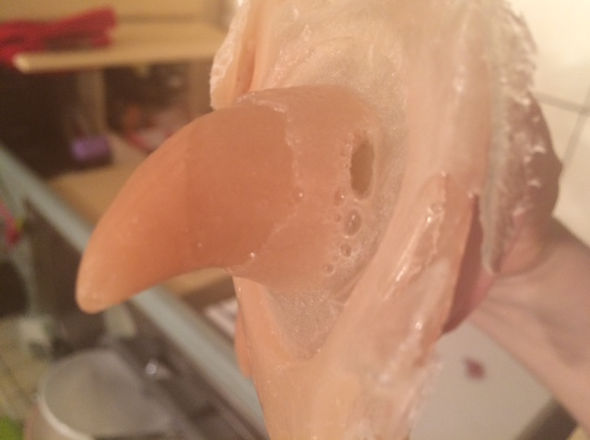
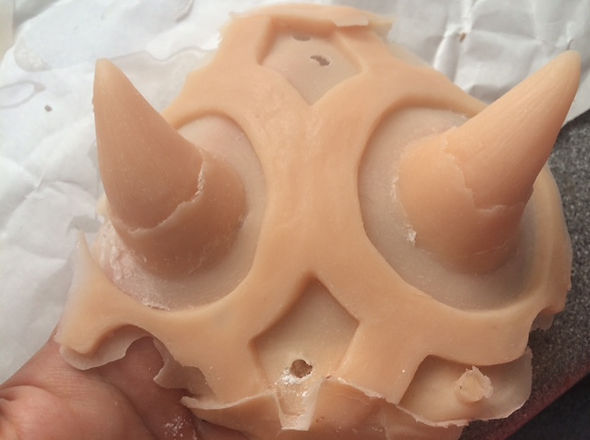
They popped straight out of the mould, I think I may actually be using too much vaseline, as I think I may be losing a slght amount of detail. I think for the future I should buff off any excess vaseline.
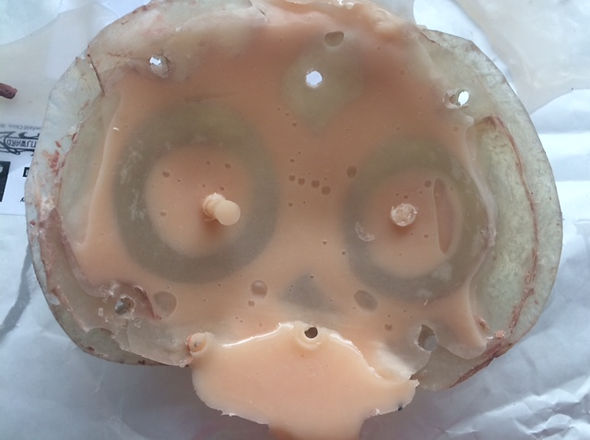
There was much more material in the mould than with pouring the silicone. The gelatine had actualy spread to about 50% of the grounding.
However, I think that the actual shape of the mould is causing so much of the material to leak out and not spread. For a full-face piece, the mould typically slopes upwards around the circumference, trapping excess material in it, whereas this mould just allows it to pour out. This may be something to consider when making my moulds in the future.

The horns came out really well, aside for some pretty large air bubbles at the back around the bottom. Like I said, because of the shape of the mould, I think it allows a lot of material to drain away. I think next time I may try and use some clay or something to try and stop too much material from escaping. The edges are quite thin, so I think I will try applying these.
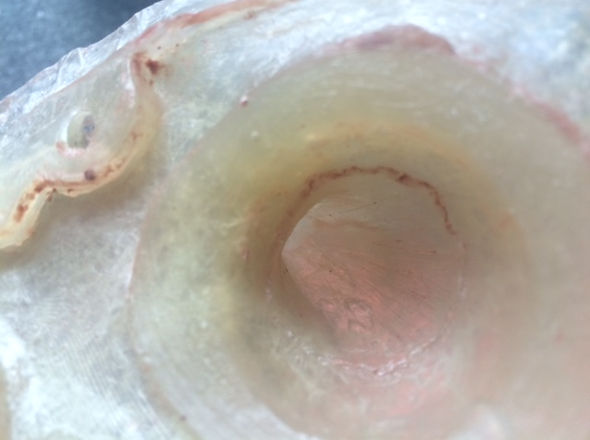
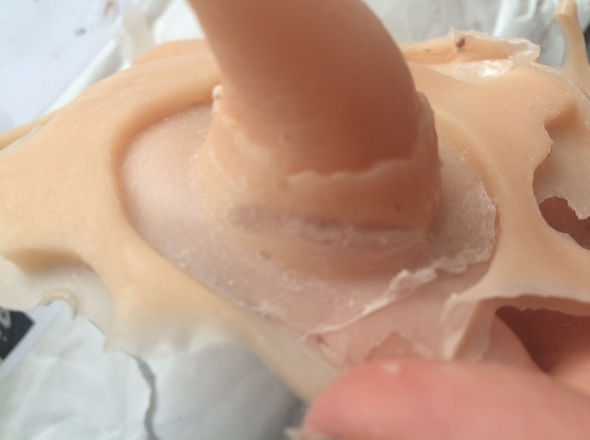
However, upon removal, I noticed there was a very small blob of silicone stuck in one of the horn areas in the fibreglass. When I pulled it out, I found that there was a small hole in the fibreglass area of the horn. I think this may be because fibreglassing around the horn was quite difficult, so maybe I didn't manage to make the fibreglass quite strong enough in certain areas. It was also hard to get the layers to stick to one another around the horns because of the shape, so maybe one of the layers wasn't supported directly by a second layer.
Injection Moulding with Silicone
- Firstly I applied 3 layers of carnuba was to both sides of the mould, let it dry and buffed it in
- Because I wasn't adding any deadener to this silicone, I didn't need to add the encapsulating layers. I did however, apply 3, just around the area where the flashing would be around the horns so that I would still be able to blend this edge.
- After realising the flaw with my mould after injecting the gelatine, I decided to try and create a clay barrier around the edge of the mould where I thought the majority of the material was leaking out.
- I injected the mix of 1:1 part A and B silicone (coloured with silicone pigment) and left it overnight. Again, after having uncuring silicone after filling the mould from the first time, I was very concious of having uncured silicone.
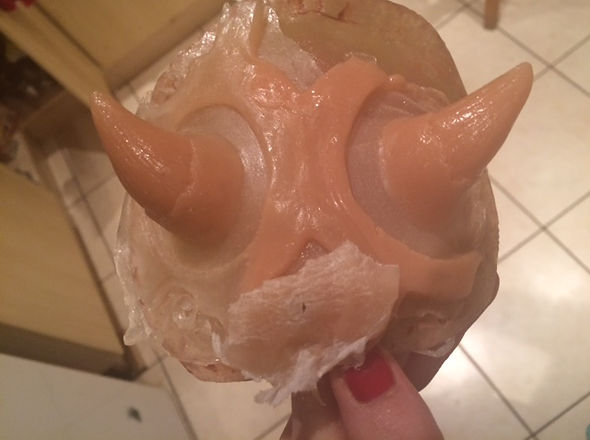
- When I opened the mould, the piece came out really easily. More of the material and stayed in the mould and spread to the grounding area, which meant my clay barrier had worked. This means in future I will be more aware of the shape of my moulds and think about how they retain whichever material I am filling it with.
- Unfortunately I forgot to tighten the bolts after injecting, so the edges aren't blendable. I will try running them again if I have time, but I will try painting and applying this piece. Obviously for the context of a film, I would run the piece until it came out with perfect edges.
- There were a few small air bubbles, but they were contained withing the piece, so they shouldn't be a problem.
- Forgoing experimentation with this piece and drawing upon the methods which I think will produce the most realistic looking piece, I will paint the skin area of this piece with skin illustrator, and the horns with PAX paint, as from experimenting with PAX, it gives an opaque look which I think would be more appropriate for painting horns than skin illustrator.


Painting the Appliances
I painted the gelatine horns with skin illustrator and the silicone ones with skin illustrator, except I did the horns with PAX paint.
I tried with both to create realistic looking skin by building up layers and adding different colours beneath the skin tone, such as greens, yellows and blues. I also added some pinky/red shades beneath before painting on any skin colour, because in my research I read about under-painting and decided to apply it for this.
I like the effect, althout working with skin illustrator can be quite difficult; sometimes you can wipe away a section by accident if the colour is too wet or dry.
I found the silicone easier to paint, as I think the material takes to the paint better.
Because I didn't use any deadener for the sillicone, both appliances feel almost identical.
I like the way the PAX paint looks on the horns, although I think it looks a little too shiny, but I can powder it. I though the translucency of skin illustrator would cause it not to be opaque enough for the horns but I think the gelatine horns look great.
Its very hard to see a difference between the two and i'm not really sure which one I prefer.


Gelatine Horns
Silicone Horns
Gelatine Horns
Silicone Horns

© 2023 by Tennis Lessons with Karen. Proudly created with Wix.com